Learn how to recover deleted slides in PowerPoint with our complete 2026 guide, including free tips, advanced methods and professional tools.
1. Introduction
This guide explains how to recover deleted slides in PowerPoint, including the following three scenarios:
- Accidentally deleted slide(s) within an open presentation
- Permanently deleted slide(s) — the deletion was saved or the undo history was cleared
- The entire PowerPoint file was deleted
2. Method 1: Undo the Deletion with Ctrl+Z
If you have not performed any other operations since the deletion, Ctrl+Z is the fastest recovery method for both a slide and a file.
2.1 Recover Deleted Slides in PowerPoint with Ctrl+Z
2.1.1 Shortcut Method
- Windows: Press Ctrl+Z (repeat as needed to undo multiple deletions)
- Mac: Press Command+Z (repeat as needed)
2.1.2 Limitations
- Undo history is cleared once the file is closed and reopened — Ctrl+Z only works within the same active session.
- Subsequent edits consume undo history slots. If many operations were performed after deleting the slides, Ctrl+Z may need to be pressed many times, and some operations (such as saving) can clear the undo history entirely.
2.2 Recover Deleted PowerPoint File with Ctrl+Z
If the file itself was deleted in File Explorer or Finder, Ctrl+Z can undo that action too.
2.2.1 Shortcut Method
- Windows: Press Ctrl+Z (repeat as needed)
- Mac: Press Command+Z
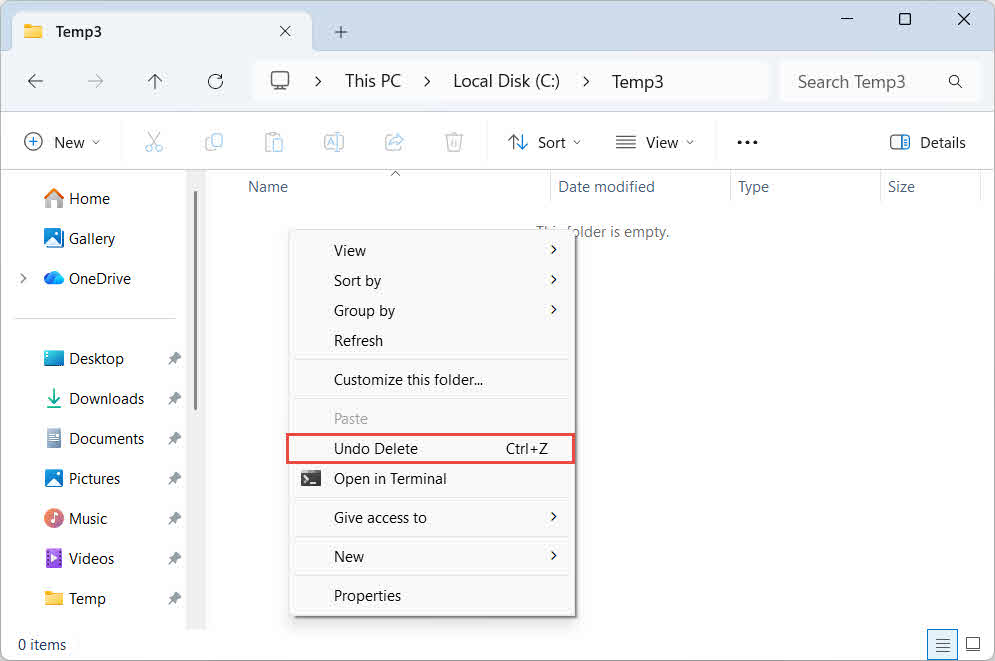
2.2.2 GUI Method
- In File Explorer, open the folder where the file was stored before deletion.
- Right-click any blank area in the folder and select Undo Delete.
3. Method 2: Restore from Backups, Copies, or Other Files
Before attempting disk-level recovery, check whether a backup, copy, or earlier version of the presentation already exists elsewhere. If the deleted slides or file originally came from the Internet or an email attachment, re-downloading or requesting a fresh copy may be the fastest fix — check your email attachments, download history, or contact the original sender.
3.1 Recover Deleted Slides in PowerPoint from Backups, Copies, or Other Files
If you have a backup, a copy, or any other PowerPoint file that still contains the deleted slides, copy those slides back into your presentation using either method below.
3.1.1 Copy & Paste Method
- Open the backup, copy, or other file that still contains the deleted slide(s).
- In the slide thumbnail pane, select the slide(s) you need.
- Press Ctrl+C to copy them.
- Switch to your current presentation, click where you want the slides inserted, and press Ctrl+V to paste.
3.1.2 Reuse Slides
This feature lets you import slides from another file more easily:
- In your current presentation, go to Home -> New Slide dropdown -> Reuse Slides.
- In the panel that opens, browse to the backup or copy file that contains the deleted slide(s).
- Click each slide you want to insert.

3.2 Recover Deleted Files from Backups, Copies or Other Files
If a backup or copy of the entire deleted PowerPoint file exists — on an external drive, a cloud drive, a shared network folder, or another device — simply copy that file back to its original location.
4. Method 3: Recover via File History/Time Machine
4.1 Recover Deleted Slides in PowerPoint via a Previous Version
If File History, Time Machine, or a cloud drive’s version history was enabled, you can restore a version of the presentation file saved before the slide was deleted, then copy the missing slide(s) back into your current file.
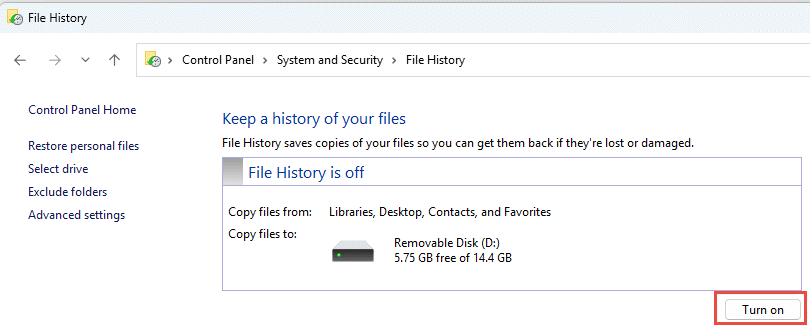
4.1.1 Windows File History
Note: File History must be turned on before the slide is deleted. Go to Control Panel -> File History to verify.
- Open File Explorer and navigate to the folder that contains the presentation.
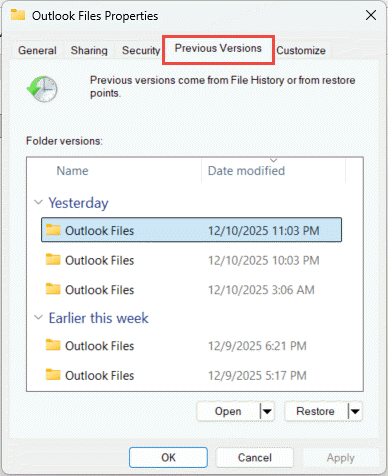
- Right-click the PowerPoint file and select Properties.
- Click the Previous Versions tab. A list of available backup snapshots appears.

- Select a version dated before the slide was deleted.
- Expand Open and select Open in File History to preview that version without overwriting your current file.
- Copy the missing slide(s) from the older version into your current presentation using Copy & Paste or Reuse Slides.
4.1.2 macOS Time Machine
- Open the folder where the presentation is stored.
- Open Time Machine from the menu bar or Applications.
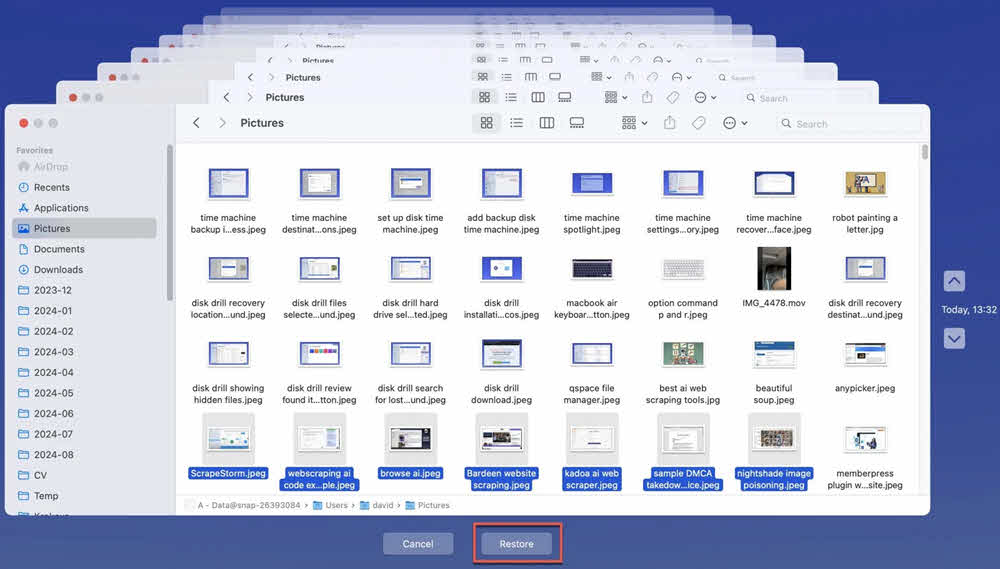
- Use the timeline on the right or the arrows to navigate back to a point before the slide was deleted.
- Select the file and click Restore. If the current file still exists, macOS prompts you to keep both files — choose Keep Both to avoid overwriting your current version.

- Open the restored older version and use Copy & Paste or Reuse Slides to bring the missing slide(s) back into your current presentation.
4.1.3 Cloud Drives
Check the following online documents to recover old versions on Cloud drives:
- Google Drive Version History
- OneDrive Version History
- SharePoint Version History
- Dropbox Version History
4.2 Recover Deleted File
If the entire presentation file was deleted, use the same File History or Time Machine method described above, but apply it to folder containing the file instead of the file itself, and restore the folder to a version dated before the file was deleted.
5. Method 4: Recover via AutoRecover
If you delete slides in a presentation, you may recover the deleted slides in PowerPoint from an AutoRecover snapshot, which may still contain the deleted slides. If you delete the entire presentation, you may also recover it from an AutoRecover snapshot.
5.1 Via File -> Open
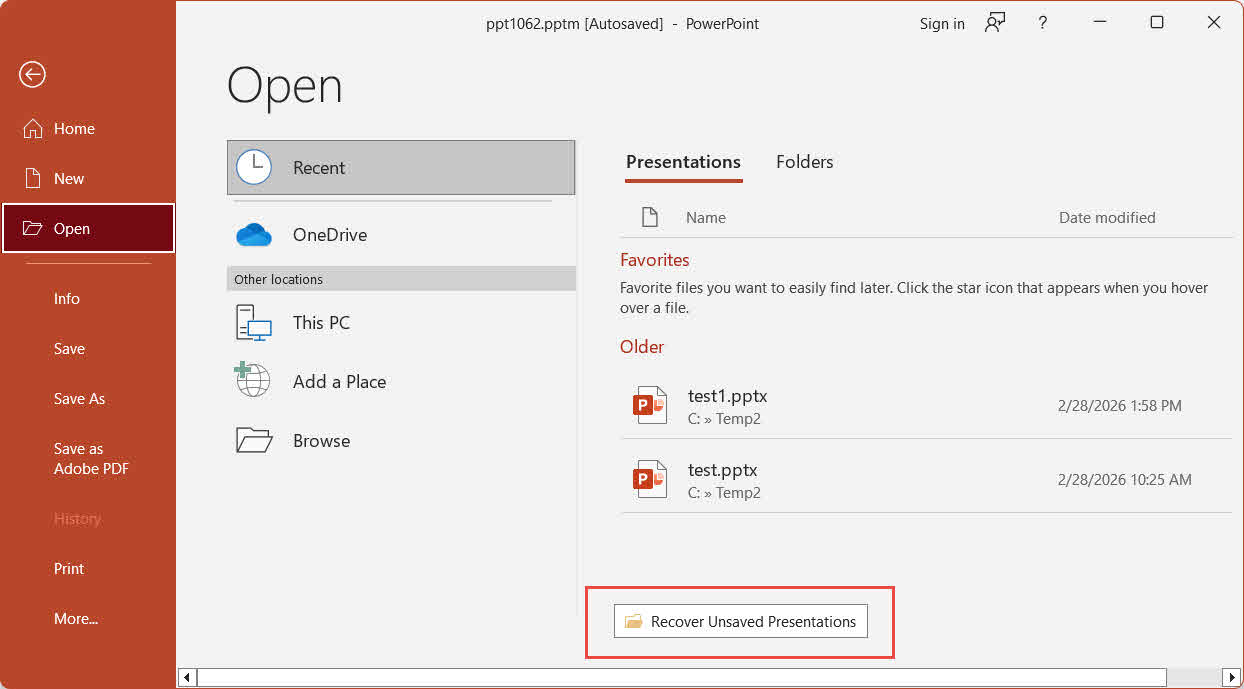
- Open PowerPoint and click File -> Open -> Recent.
- Scroll to the bottom of the list and click Recover Unsaved Presentations.
- In the Open window, select your file and click Open.
- Save the recovered file immediately using File -> Save As.
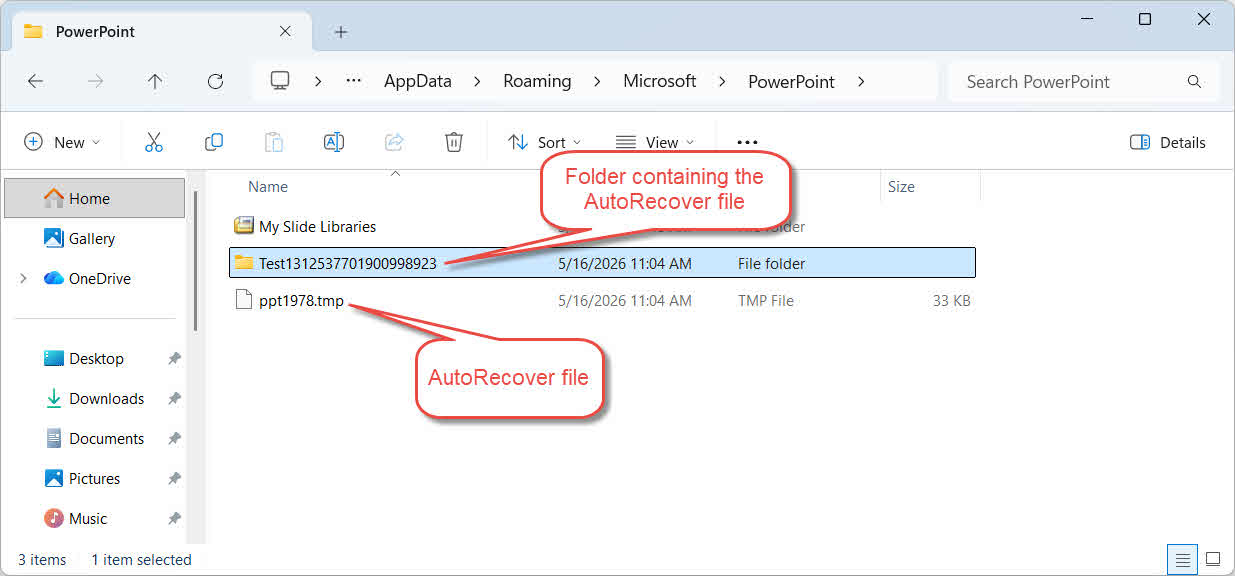
5.2 Search the AutoRecover Folder Manually
If the above step returns no results, search the AutoRecover folder directly.
- Press Windows Key + R, type %AppData%\Microsoft\PowerPoint\, and press Enter.
- Click the Date Modified column header to sort files by newest first.
- Open candidate files to identify your lost presentation.
- If a file cannot open, change its extension to .pptx tentatively and try again.
- Immediately save the recovered file with File -> Save As.
6. Method 5: Search the UnsavedFiles Cache Folder
Office maintains a dedicated UnsavedFiles cache folder, shared by Word, Excel and PowerPoint, that may contain a version with the deleted slides, or a recoverable copy of the deleted file.
- Open File Explorer and navigate to C:\Users\[Username]\AppData\Local\Microsoft\Office\UnsavedFiles.
- Click the Date Modified column header to sort files by newest first.
- If a file cannot open, change its extension to .pptx tentatively and try again.
- Open any relevant file and save it immediately with File -> Save As.
7. Method 6: Search the Temp Folder
The operating system’s temporary files folder may also contain a file version with the deleted slides, or the deleted file itself.
Windows:
- Press Windows Key + R, type %temp%, and press Enter.
- In the File Explorer search box, search for
*.tmp,*.ppt, and*.pptxfiles, or files starting with ~, ~$, or $. Sort results by Date Modified. - Look for a candidate file larger than 0 KB that was created during your work session.
- Make a copy of the file, then change the copy’s extension to .pptx.
- Open the copy in PowerPoint.
- If the file opens successfully, save it immediately with File -> Save As.
Note: Also check the folder where the original file was saved for files beginning with ~, ~$, or $ — PowerPoint creates these during an active session and they may contain recoverable content. In the File Explorer search box, enter the following filters:
- Files starting with ~:
System.FileName:~<"~" - Files starting with ~$:
System.FileName:~<"~$" - Files starting with $:
System.FileName:~<"$"
Mac:
- Open Terminal (use Spotlight to find it).
- Type open $TMPDIR and press Enter.
- In the Finder window that opens, navigate to the TemporaryItems folder.
- Look for your presentation and open it to verify its contents.
- Save a permanent copy immediately.
8. Method 7: Search the Whole Computer
Instead of checking individual folders one by one, you can also search the entire computer for PowerPoint or temporary files created during your work session.
- Open File Explorer and click This PC in the left panel to search across all drives.
- Click the search box in the top-right corner and type
*.pptx OR *.ppt OR *.tmp, then press Enter. - Sort results by Date Modified to bring the most recent files to the top.
- Do not open PowerPoint while reviewing results, as that may trigger a cleanup of AutoRecover and temporary files.
- Copy any promising file to a separate folder before opening it.
- For .tmp files, change the extension to .pptx.
- Open the file in PowerPoint. If it opens successfully, save it immediately with File -> Save As.
9. Method 8: Recover Deleted Files from Recycle Bin
This method can only recover deleted files, not deleted slides from a presentation that is still on disk.
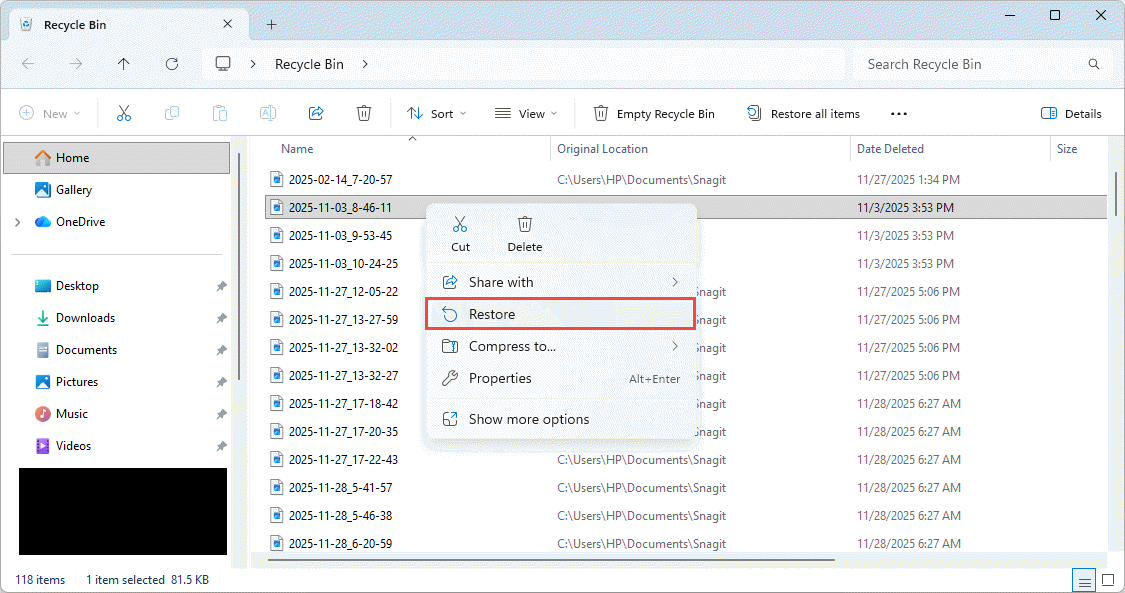
9.1 Windows Recycle Bin
When a file is deleted normally (without Shift+Delete), Windows moves it to the Recycle Bin rather than erasing it permanently.
- Double-click the Recycle Bin icon on the desktop, or search for it in the Start menu.

- Locate your PowerPoint file. Use the search box or sort by Name or Date Deleted to find it faster.
- Right-click the file and select Restore. The file returns to its original location.


Note: For a network shared drive, check its own recycle bin on the server side instead of the local one.
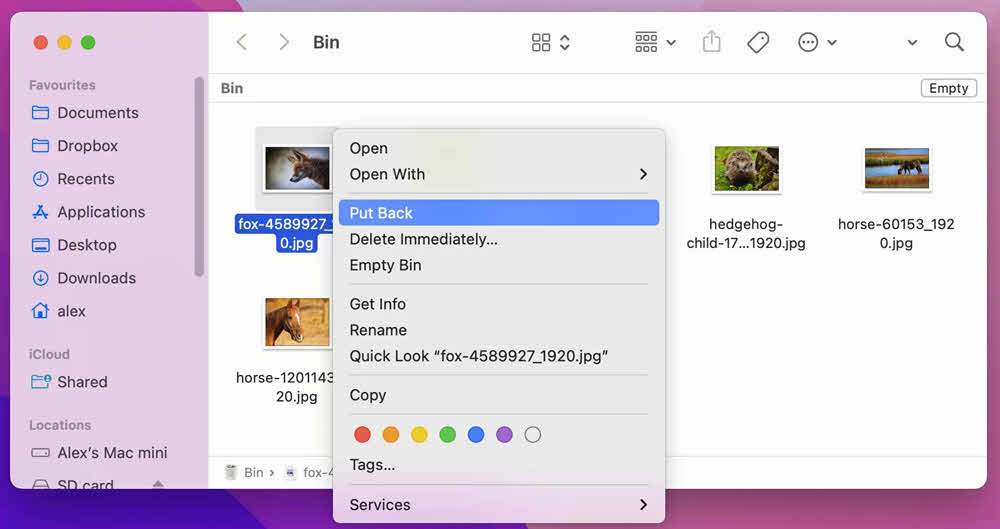
9.2 macOS Trash
On macOS, deleted files go to the Trash before permanent removal.
- Click the Trash icon in the Dock.
- Locate your PowerPoint file.
- Right-click the file and select Put Back to restore it to its original location.

9.3 Cloud Drive Recycle Bin
If the file was stored on a cloud drive, check its own separate recycle bin:
- OneDrive Recycle Bin
- SharePoint Recycle Bin
- Google Drive Trash
- Dropbox Deleted Files
- iCloud Drive Recently Deleted
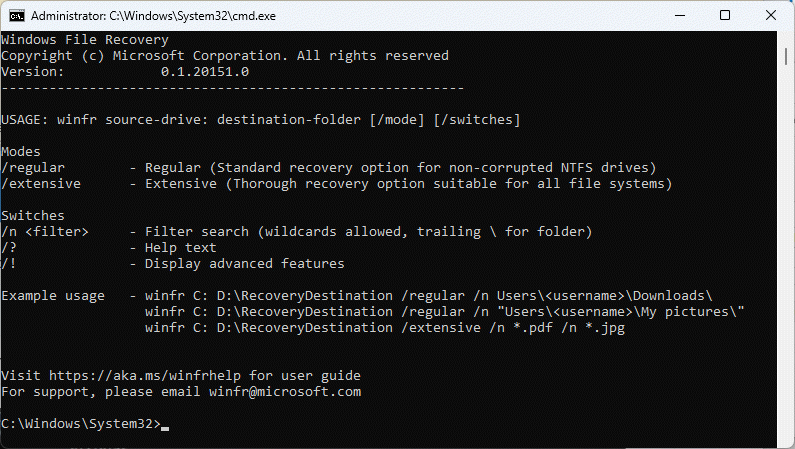
10. Method 9: Use Windows File Recovery
Windows File Recovery is a free command-line tool from Microsoft that can recover deleted files.
- Download and install Windows File Recovery from the Microsoft Store.
- Press the Windows key, type Windows File Recovery, and open the app. Select Yes when prompted.
- Enter a recovery command in the following format: winfr source-drive: destination-folder [/mode] [/switches].

Use Regular mode for recently deleted files on NTFS drives:winfr C: E:\Recovery /regular /n *.pptx /n *.ppt
Use Extensive mode for files deleted long ago or on non-NTFS drives:
winfr C: E:\Recovery /extensive /n *.pptx /n *.ppt
- Type Y when prompted to confirm and start the scan.
- After the scan completes, open the destination folder and check the recovered files.
- Some files may have lost their original names; open each one to verify its contents.
11. Method 10: Use Professional File Recovery Software
When all the above methods fail, professional data recovery software such as DataNumen Data Recovery can help you recover the deleted PowerPoint files.
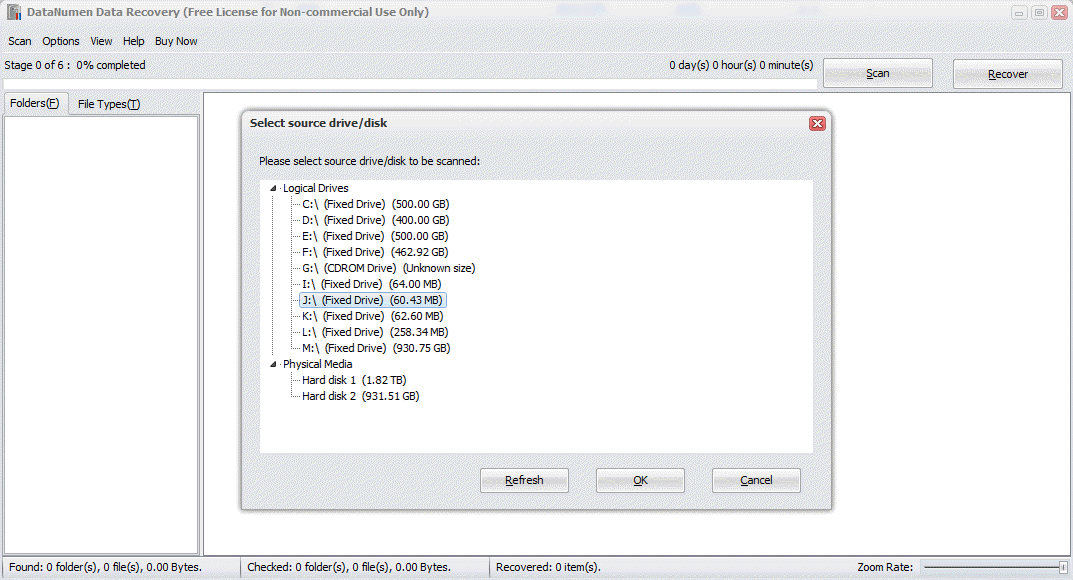
- Start DataNumen Data Recovery.
- Select the source drive where the deleted file was stored, then click OK to scan.

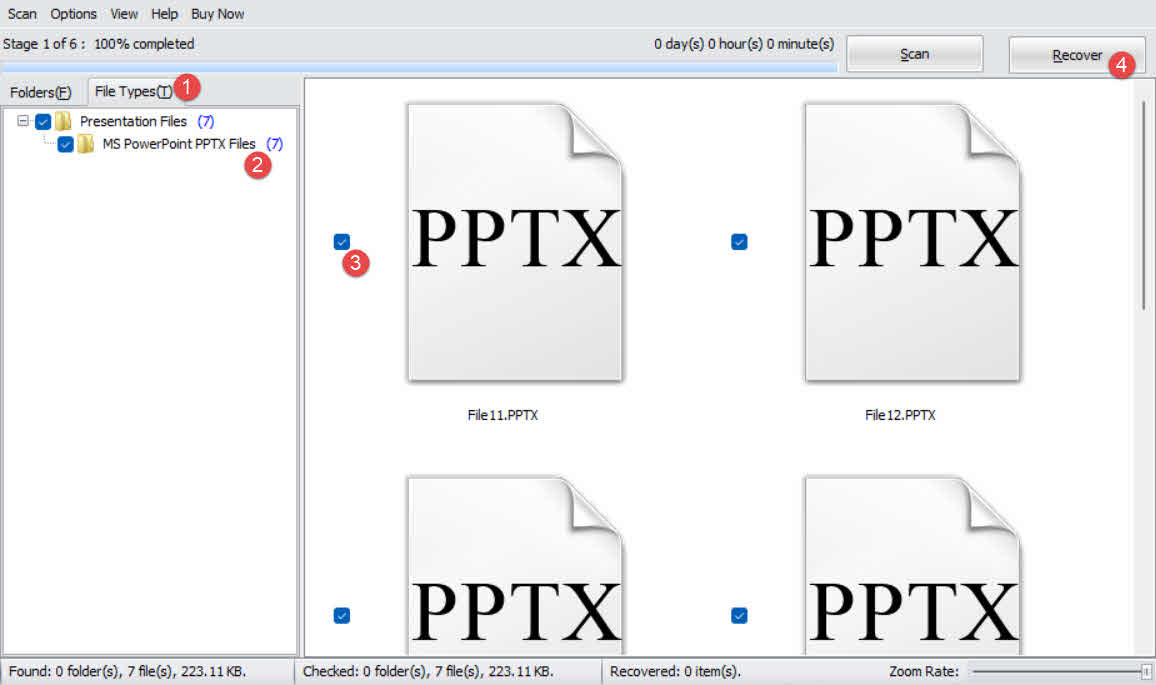
- In the scan results, click the File Type tab in the left panel.
- Select Presentation Files to filter results, or select MS PowerPoint PPTX Files for more specific results.
- Review the candidate files listed in the results panel.
- Check the files you want to recover and click Recover.

- Choose a recovery destination on a different drive to avoid overwriting data, then click OK.
12. Repair Corrupt Recovered PowerPoint Files
Recovered files — particularly those retrieved from temp files or data recovery scans — may be corrupt and fail to open in PowerPoint. In such cases, DataNumen PowerPoint Recovery can repair these files.
- Close PowerPoint and any other application that may have opened the source file.
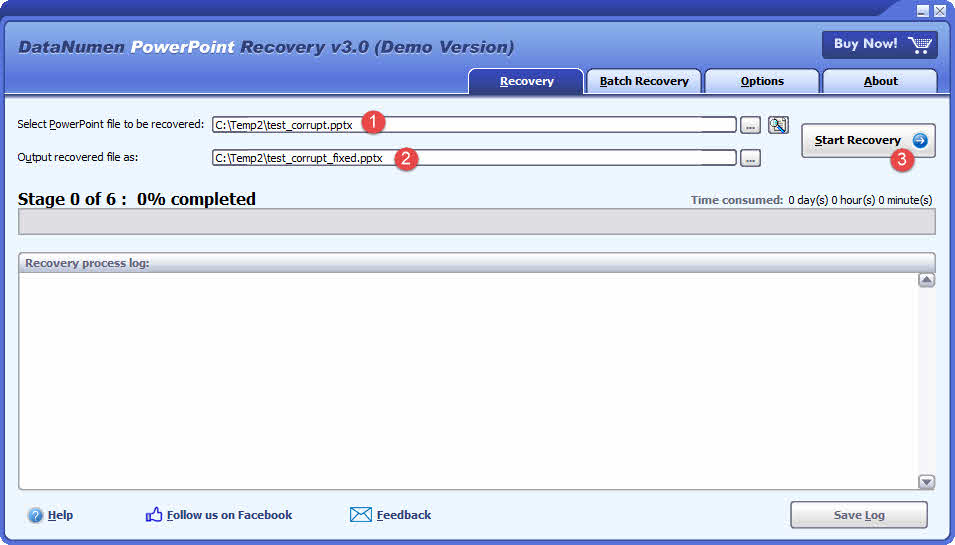
- Start DataNumen PowerPoint Recovery.
- Select the corrupt PowerPoint file.
- Set the output fixed file name.
- Click Start Repair.
- After the process completes, open the output file to verify the recovered data.
13. How to Prevent Future Loss
The following measures significantly reduce the risk of permanently losing a slide or presentation you delete by mistake:
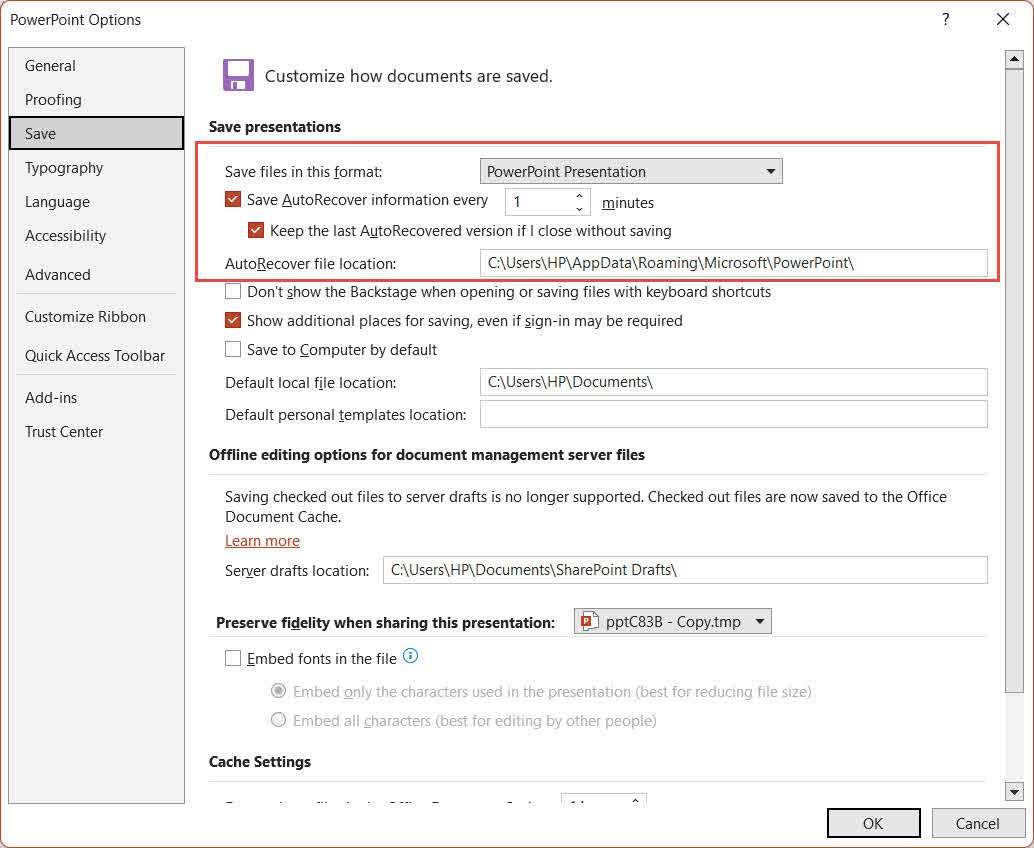
- Enable AutoRecover with a short interval. Go to File -> Options -> Save. Make sure Save AutoRecover information every [n] minutes is checked and reduce the interval to 1–2 minutes.

- Follow a regular backup strategy. Apply the 3-2-1 rule: keep at least three copies of critical files, on two different types of media, with one copy offsite or in the cloud.
- Enable File History. Connect an external drive and go to Control Panel -> File History to enable automatic backups of personal files at regular intervals.

- Avoid Shift+Delete. Always use the standard Delete key to send files to the Recycle Bin instead of permanently bypassing it.
- Use antivirus software. Malware can silently delete or corrupt files. Keep antivirus definitions up to date to prevent malware-related data loss.
14. Frequently Asked Questions
Q: Can I recover a single deleted slide rather than recovering the entire presentation?
A: If the presentation is still open, use Ctrl+Z immediately (Section 2.1). If it has been saved and closed, restore the slide from a backup or copy (Section 3.1), or recover a previous version of the file through File History, Time Machine, or cloud version history (Section 4.1). An AutoRecover snapshot (Section 5) may also contain an earlier version with the slide.
Q: My PowerPoint file was permanently deleted and the Recycle Bin is empty — can it still be retrieved?
A: Yes, provided the disk space has not been overwritten. Stop using the affected drive immediately and try Windows File Recovery (Section 10) or professional data recovery software (Section 11). Recovery success decreases the longer the drive continues to be used.
Q: The deleted file was on a network drive and isn’t in my local Recycle Bin. Where do I look?
A: Files deleted from network shares do not go to the local Windows Recycle Bin. Check the network share’s own recycle or trash folder (Section 9.1). If it is not visible, contact your IT administrator — the network server may have a server-side recycle bin that requires admin access.
Q: How long do I have before a permanently deleted PowerPoint file becomes unrecoverable?
A: There is no fixed window. On an HDD, deleted data can persist for days or weeks if the drive is not heavily used. On an SSD with TRIM enabled, the data may be erased within minutes. Act immediately and avoid writing any new data to the affected drive.
Q: I overwrote my presentation by saving changes. Can I get the old version back?
A: Check for an AutoRecover snapshot (Section 5). For files on OneDrive or SharePoint, use Version History (Section 4.1). If Windows File History was enabled, restore a previous version of the file (Section 4.1.1).
Q: Are third-party recovery tools safe to use?
A: Reputable tools operate in read-only mode during scanning and do not modify the source drive. Always save recovered files to a different drive — not the original — to avoid overwriting other recoverable data.
Q: What should I do immediately after accidentally deleting a slide or PowerPoint file?
A: Stop using the affected drive immediately, as any new data written to it may overwrite the deleted slide or file and make recovery impossible. If you deleted a slide, try Ctrl+Z first (Section 2.1). If you deleted the entire file, check the Recycle Bin (Section 9), then work through the remaining methods in order.
Q: My recovered PowerPoint file is corrupted and won’t open. What are my options?
A: Use PowerPoint’s built-in Open and Repair function first: go to File -> Open -> Browse, select the file, click the dropdown arrow next to Open, and choose Open and Repair. If that fails, use DataNumen PowerPoint Recovery (Section 12) for a deeper repair of the file structure.
15. Conclusion
To recover deleted slides in PowerPoint, start with the fastest method: Ctrl+Z (Section 2). If the presentation has already been saved or closed, check for a backup, copy, or earlier version of the file (Sections 3–4), then work through the AutoRecover and temporary file methods (Sections 5–8). If the whole file was deleted and no copy exists, check the Recycle Bin (Section 9) first, then try Windows File Recovery (Section 10) or professional software such as DataNumen Data Recovery (Section 11). If the recovered file is corrupt, DataNumen PowerPoint Recovery (Section 12) can repair it. Following the prevention steps in Section 13 — especially a short AutoRecover interval and a cloud or external backup — makes it much easier to recover deleted PowerPoint slides the next time disaster strikes.
About the Author
Shou Sheng is a Microsoft Office specialist with over 10 years of hands-on experience in Word, Excel, and PowerPoint troubleshooting across enterprise and educational environments. He has helped thousands of users recover lost work, resolve file corruption issues, and optimize their Office workflows.
Through his technical writing, Shou is committed to translating complex Office troubleshooting into clear, actionable steps for users of all skill levels. He keeps up with the latest developments in Microsoft 365 and continuously tests methods against real-world file corruption scenarios to ensure accuracy.
Have questions about this guide or need additional help with Office issues? Shou welcomes feedback and suggestions for improving these troubleshooting resources.