Unlike forward, email redirection will not include the original message headers and not add the “FW” prefix alike in the email subject, such that the recipients cannot know the original email’s actual sources. This article will show you 2 quick methods to redirect an email.
When you forward an email, you will find that the forwarding email will automatically include the original message header, namely its actual sources. And “FW” prefix will be auto added to the subject, like the following screenshot:

However, at times, for some reasons, you’re reluctant to let your recipients know the actual sources of the original message. Therefore, if you still use “Forward”, you have to manually delete the email header and “FW” every time. It will troublesome. In this case, why not try “Email Redirection”? It will create a same email as the original message and won’t include its header. Also, you won’t see any prefixes like “FW” in its subject. Here are 2 smart tips to redirect an email.
Tip 1: Resend this Email
- At the very outset, start Outlook application as usual.
- Then pitch on an email which you want to forward.
- Next double click on the mail to open it in its own window.
- In the popup message window, hit “Actions” button in “Move” group.
- From its drop down list, you ought to select “Resend This Message”.

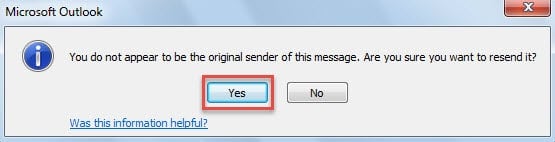
- Subsequently, you may receive a message, like the following screenshot. Now you should select “Yes”.

- Finally a new message will turn up, in which only the original message body remains. At this point, you can compose the message and send it out lastly.


Tip 2: Redirect an Email with Outlook VBA
- In the first place, switch to “Developer” tab and click on “Visual Basic” button.
- Then in the new window, you can open a new module by “Insert” > “Module”.
- Subsequently, you ought to copy and paste the following VBA codes into it.
Sub RedirectEmail()
    Dim olItem As MailItem
    Dim olNewMail As MailItem

    Set olItem = Application.ActiveExplorer.Selection.Item(1)

    If olItem.Class = olMail Then
       Set olNewMail = olItem.Forward
       With olNewMail
            'Remove "FW" prefix in subject
            .Subject = olItem.Subject
            .HTMLBody = olItem.HTMLBody
            .Display
       End With
    End If
End Sub

- After that, you can exit the current window and change your macro security level to low.
- Later you need to add the new VBA project to Quick Access Toolbar or ribbon. Here we take “Ribbon” as an example.
- Firstly, go to “File” > “Options” > “Customize Ribbon”.
- Then create a new group under “Home” tab.

- Next you need to add the new macro to the new custom group and select a preferred icon to it, like the following image.


- Eventually you can go back to the main Outlook window. You will find the new button, shown as the image below.
 From now on, every time when you want to redirect an email, you can first select the email and then click the button.
 From now on, every time when you want to redirect an email, you can first select the email and then click the button.
Never Look Down Upon Outlook Data Protection
Some users haven’t encountered any Outlook errors in a long time, thus they feel that they will never suffer Outlook PST data damage. Actually it is an imprudent to think that. Outlook issues can occur without any warnings. Hence, you should keep taking sufficient precautions, including making regular backups and getting hold of a powerful repair tool.
Author Introduction:
Shirley Zhang is a data recovery expert in DataNumen, Inc., which is the world leader in data recovery technologies, including repair damaged SQL Server mdf data and outlook repair software products. For more information visit www.datanumen.com