1. Understanding Hard Drive Data Loss
Hard drive data loss can happen to anyone, from individual users to large organizations. Understanding the common causes and recognizing warning signs early can help you take the right steps for successful hard drive recovery.
1.1 Common Causes of Data Loss
Data loss from hard drives occurs for several reasons:
- Hardware Issues: Electrical failures and power surges can damage hard drive components. Physical impacts or drops can misalign read/write heads or damage platters. Bad sectors develop over time and prevent data access in affected areas.
- Human Errors: Accidental deletion of important files is one of the most common causes. Unintentional formatting erases all data on a partition. Improper shutdown during file editing can corrupt data and file system structures.
- Software Issues: Operating system or software corruption can make drives inaccessible. File system damage prevents the OS from reading directory structures. RAW file system issues occur when the file system becomes unrecognizable.
- Malware and Virus Infections: Malicious software can encrypt, delete, or corrupt files. Ransomware specifically targets user data for extortion. Some viruses damage boot sectors and file allocation tables.
- Environmental Factors: Overheating causes component failure and data corruption. Water or liquid damage creates short circuits and corrosion. High humidity exposure accelerates internal component degradation.
1.2 Signs Your Hard Drive Needs Recovery
Recognizing these warning signs can help you act quickly before data loss becomes permanent:
- Drive Not Recognized by System: The computer fails to detect the hard drive in BIOS or operating system. The drive letter doesn’t appear in File Explorer or Disk Utility.
- Drive Shows as RAW or Unformatted: Windows prompts “You need to format the disk before you can use it.” The file system shows as RAW instead of NTFS, FAT32, or exFAT.
- Clicking or Grinding Noises: These mechanical sounds indicate physical damage to read/write heads or platters. Clicking noises often mean the head assembly is malfunctioning.
- “Unknown, Not Initialized” Error: Disk Management shows the drive as “Unknown, Not Initialized.” The system cannot read partition information or boot sector.
- Repeated Restarts or Blue Screen Errors: The system repeatedly restarts during boot or operation. Blue screen errors (BSOD) with messages like “INACCESSIBLE_BOOT_DEVICE” or “UNMOUNTABLE_BOOT_VOLUME” indicate potential hard drive failure. Frequent crashes while accessing specific files or directories suggest bad sectors or file system corruption.
- Extremely Slow Response Times: Files take unusually long to open or copy. The system freezes when accessing the drive. These symptoms often indicate failing hardware or bad sectors.
2. Critical Steps Before Recovery
Taking the right preparatory steps significantly increases your chances of successful hard drive data recovery. These critical actions protect your data from further damage during the recovery process.
2.1 Stop Using the Hard Drive Immediately
When you discover data loss, immediately stop all operations on the affected hard drive. Continued use reduces recovery chances because writing new data can overwrite the areas where deleted files reside. Even routine system operations like temporary file creation or system updates can permanently destroy recoverable data. Avoiding data overwriting is the single most important factor in successful hard disk recovery.
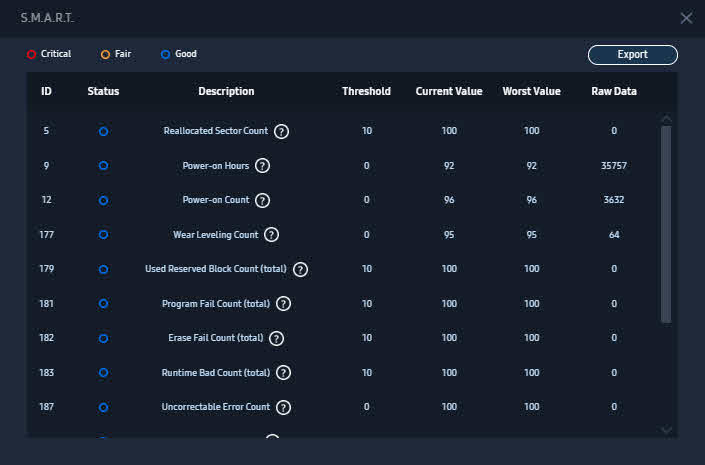
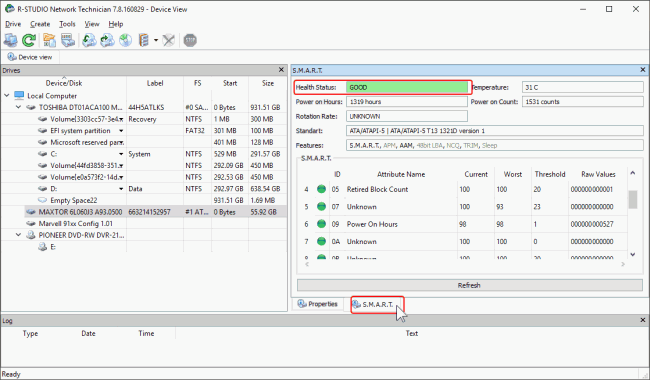
2.2 Check SMART Status
Before attempting recovery, check the hard drive’s SMART (Self-Monitoring, Analysis, and Reporting Technology) status to assess its physical health. Using CrystalDiskInfo or built-in drive utilities, you can view important health indicators like reallocated sector count, pending sector count, and overall drive condition. Interpreting SMART data helps you decide whether to proceed with software recovery or immediately seek professional services for physically damaged drives.
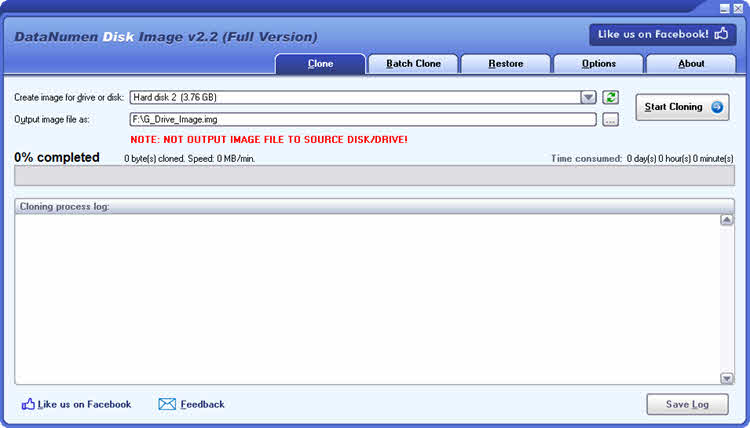
2.3 Create Disk Image or Clone
Creating a disk image is essential before attempting any recovery operations. Disk imaging creates a sector-by-sector copy of your failed drive, serving several purposes:
- If the data recovery tool supports recovering from the disk image, you can work on the image instead of the original. This protects the original drive from further damage during recovery attempts.
- If the data recovery tool does NOT support recovering from the disk image, you have two options:
- Mount the disk image as a drive using tools such as OSFMount or ImDisk Toolkit. Then recover from the mounted drive.
- The disk image becomes a backup of your original hard drive. In case your recovery efforts damage the original hard drive, you can still use the disk image for further recovery attempts.
Tools for creating disk images include:
- DataNumen Disk Image (Windows): User-friendly interface with advanced imaging options for damaged drives.
- dd (Linux): Basic disk copying tool suitable for healthy drives. Command example:
sudo dd if=/dev/sdX of=~/disk_image.img bs=4M - ddrescue (Linux): Enhanced recovery-specific tool that handles bad sectors intelligently. Recommended for damaged drives with multiple retry attempts and logging capabilities.
Steps to create disk images:
- Unmount the failed hard drive to prevent any write operations.
- Connect the failed hard drive to another working computer via SATA or USB adapter.
- Use your chosen tool to create the disk image, saving it to a different healthy drive with sufficient space.
3. What NOT to Do
Knowing what to avoid is just as important as knowing the correct recovery procedures. These common mistakes can cause irreversible damage to your data.
3.1 Never Use CHKDSK for Data Recovery
CHKDSK causes irreversible damage when used during data recovery attempts. This Windows utility is designed for file system repair, not data recovery, and operates by renaming, moving, and deleting files it considers corrupted. How CHKDSK renames, moves, and deletes files makes it incompatible with data recovery efforts. The proper use case for CHKDSK is after successful data recovery, when you want to repair the file system for continued drive use.
For more details on CHKDSK, see our comprehensive guide.
3.2 Avoid Repeatedly Plugging/Unplugging Clicking Drives
If your hard drive makes clicking noises, repeatedly connecting and disconnecting it worsens the physical damage. Each power cycle attempts to calibrate the read/write heads, potentially causing them to strike the platters and destroy data. When you hear clicking sounds, leave the drive powered off and consult professional hard drive recovery services immediately.
3.3 Avoid Repeatedly Powering the Drive On and Off
When a hard drive fails to respond, repeatedly powering it on and off accelerates damage and reduces recovery chances. If a drive does not respond after one or two boot attempts, leave it powered off and consult professional data recovery services.
3.4 Never Physically Strike or Shake the Drive
When a hard drive malfunctions, physically striking, shaking, or dropping it causes severe additional damage to internal components. If your drive is not responding, leave it powered off and stationary. Physical force never fixes drive problems and always reduces data recovery success rates.
3.5 Never Open Hard Drive Without Cleanroom Facilities
Opening a hard drive outside a professional cleanroom environment causes irreversible contamination and data loss. If your drive has physical damage requiring internal access, contact professional recovery services with certified cleanroom facilities. DIY attempts to open drives, even “just to look,” eliminate most professional recovery options.
3.6 Never Replace Circuit Boards Yourself
When a hard drive fails after a power surge, the circuit board (PCB) may be damaged. Attempting DIY board replacement eliminates professional recovery options and often converts a recoverable drive into a total loss.
3.7 Never Freeze the Hard Drive
Freezing hard drives in a freezer was a popular DIY technique in the 1990s and early 2000s for older drives, but this method is now universally rejected by data recovery professionals and causes severe damage to modern hard drives.
3.8 Don’t Format Unless Absolutely Necessary
Formatting a drive, even quick format, significantly reduces data recovery success rates. Quick format removes file system structures but leaves most data intact and recoverable. Full format overwrites every sector, making recovery nearly impossible. Only format a drive after you’ve successfully recovered all important data or determined that recovery is not necessary.
4. Built-in System Tools for Hard Drive Recovery
Both Windows and macOS include built-in tools for basic hard drive data recovery scenarios. While these tools have limitations, they’re free and can handle simple recovery tasks.
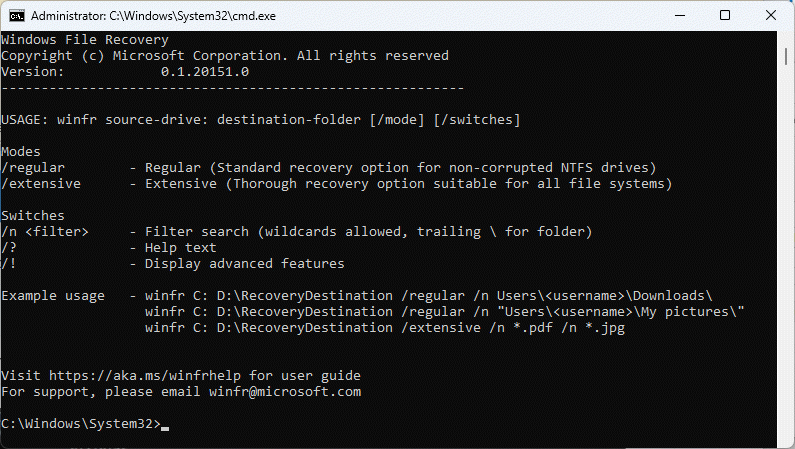
4.1 Windows File Recovery Tool
Windows File Recovery is a command-line utility included with Windows 10 and Windows 11 that provides three recovery modes for different scenarios:
- Download Windows File Recovery from the Microsoft Store if not already installed.
- Open Command Prompt as administrator.
- Choose the appropriate mode:
- Regular mode: For regular recovery on NTFS file systems. Command:
winfr C: D: /regular - Extensive mode: If regular mode cannot recover the wanted files, try extensive mode. Extensive mode also works for non-NTFS file systems. Command:
winfr C: D: /extensive
- Regular mode: For regular recovery on NTFS file systems. Command:
- Replace C: with your source drive and D: with the destination drive for recovered files.
- Wait for the scan to complete and review recovered files in the destination drive.
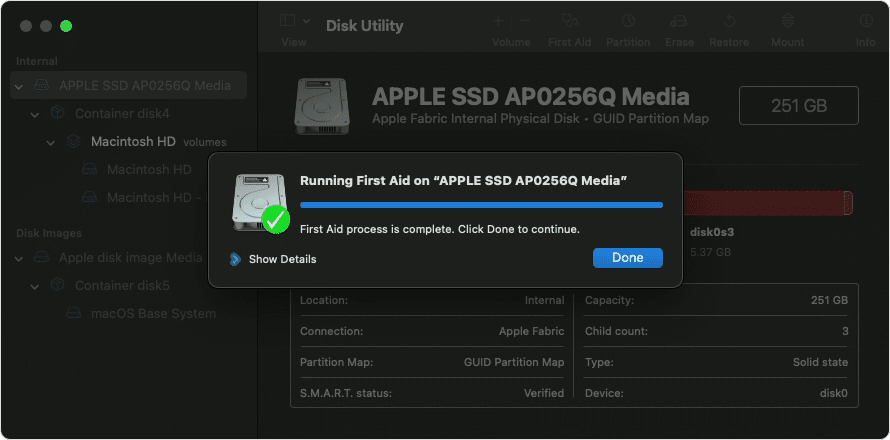
4.2 macOS Disk Utility
macOS includes Disk Utility with basic recovery and repair capabilities:
- Launch Disk Utility from Applications -> Utilities.
- Select the affected hard drive from the sidebar.
- Click First Aid button in the toolbar.
- Click Run to verify and repair disk errors.
- If First Aid fails or the drive shows as unmounted, try mounting it by clicking Mount button.
- For command-line recovery, open Terminal and use diskutil commands or third-party tools like ddrescue.
5. Third-Party Data Recovery Software
Third-party data recovery software offers more advanced features and higher success rates than built-in system tools. These tools range from professional-grade applications to free open-source alternatives.
5.1 Professional-Grade Recovery Tools
Professional tools are optimized for complex recovery scenarios.
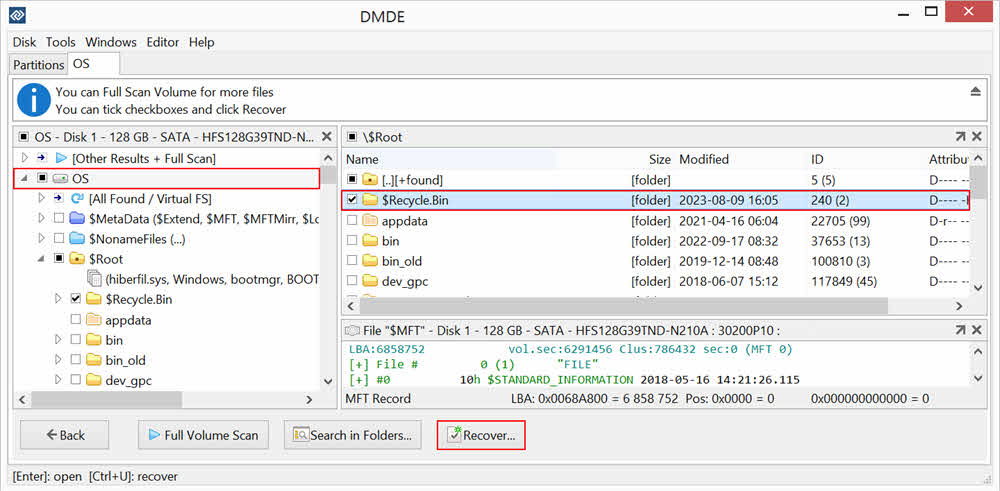
5.1.1 DMDE
DMDE (DM Disk Editor and Data Recovery Software) offers exceptional value at just $20. It provides the best cost-effectiveness ratio among professional tools with full folder recovery preserving original file structures and names. The software supports selective file recovery, allowing you to choose specific files or directories. DMDE has strong community support with detailed documentation and receives consistent positive feedback from data recovery professionals.
5.1.2 R-Studio
R-Studio is widely used by professionals for its comprehensive feature set. While complex, it’s extremely powerful for handling difficult recovery scenarios. Advanced recovery features include RAID reconstruction, virtual disk support, and hexadecimal editor capabilities. R-Studio offers cross-platform support for Windows, macOS, and Linux, making it versatile for various recovery situations.
5.2 Commercial User-Friendly Software
Commercial software targets general users with intuitive interfaces and guided recovery processes.
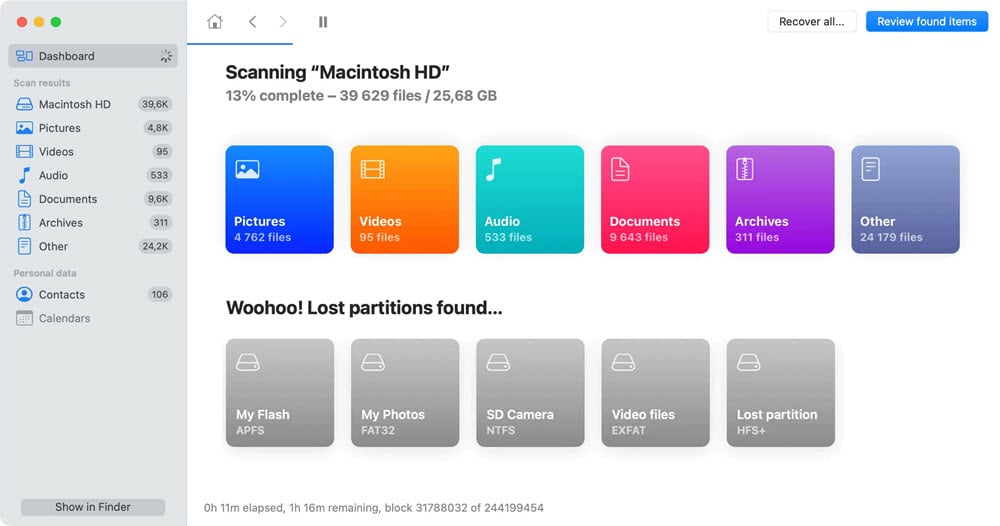
5.2.1 Disk Drill
Disk Drill features a user-friendly interface that makes hard drive recovery accessible to non-technical users. The software offers 500MB free recovery so you can test its effectiveness before purchasing. Built-in disk imaging capabilities allow you to create protective copies before recovery. Cross-platform compatibility supports both Mac and Windows with identical feature sets. Pricing ranges from $80 for the basic version to $89 for complete features.
5.3 Free and Open-Source Tools
Free tools provide capable recovery options without financial investment.
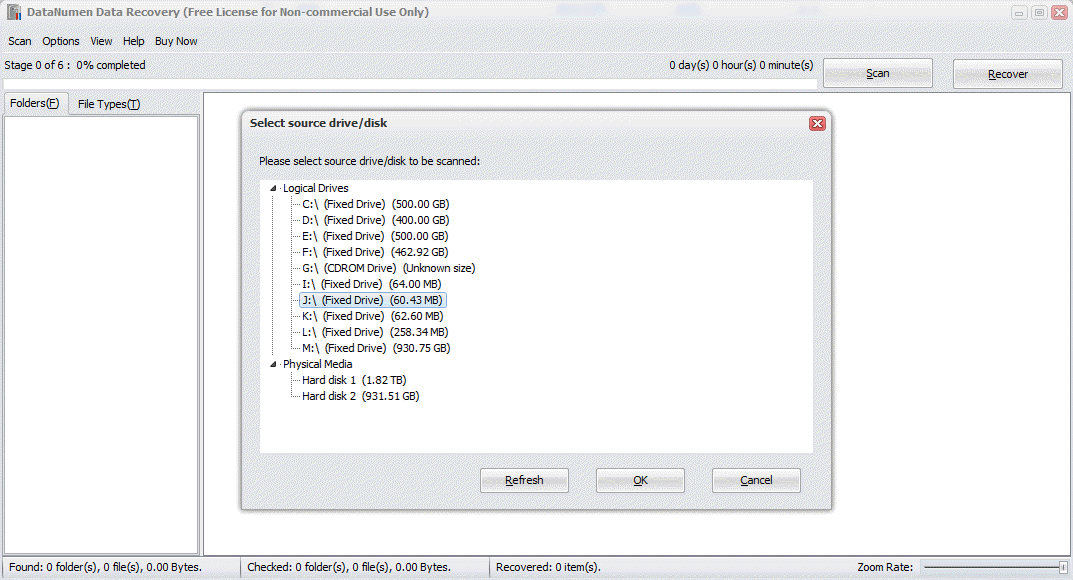
5.3.1 DataNumen Data Recovery
DataNumen Data Recovery is a free and comprehensive recovery solution that can recover lost, deleted, and corrupted data.
Key features:
- Support for over 430 file types.
- Support all kinds of file systems, including NTFS, FAT, FAT32 and Ext2
- Recover files lost due to reformat of the drive, corruption of the drive or any other reasons
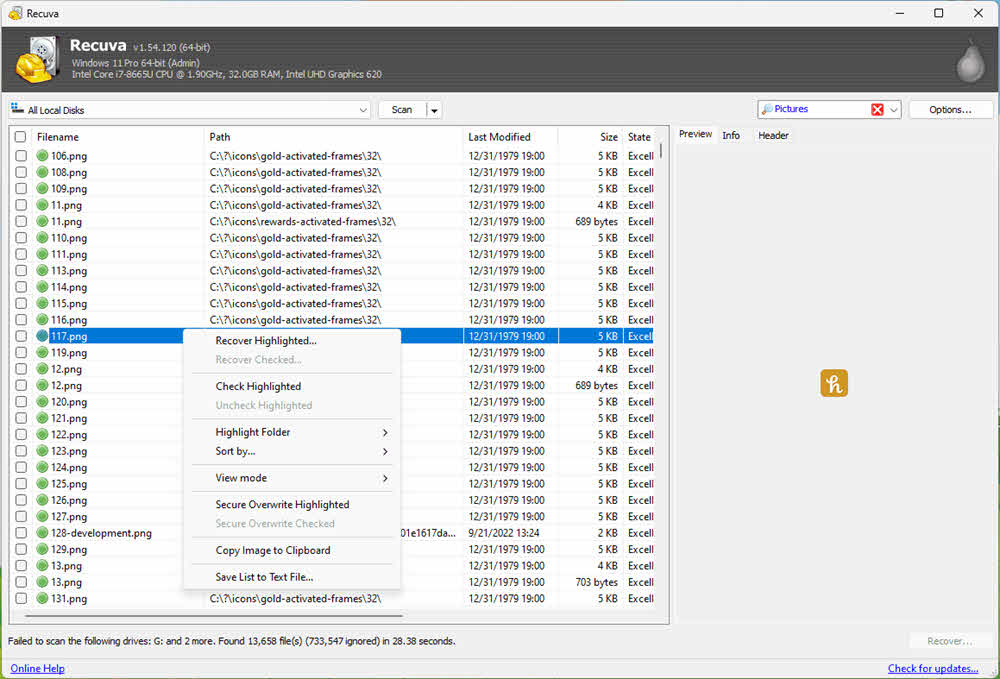
5.3.2 Recuva
Recuva is another free tool. Deep scan mode enables thorough searches for recoverable files in difficult scenarios. The user-friendly interface makes it accessible for beginners while providing advanced options for experienced users. Windows compatibility ensures broad accessibility, though it has limitations with certain disk types and advanced recovery scenarios. Recuva works best with recently deleted files from healthy drives.
6. Linux-Based Recovery Methods
Linux systems often succeed where Windows fails to recognize or access problematic hard drives, making them valuable alternatives for hard drive recovery.
6.1 Why Linux Often Succeeds Where Windows Fails
Linux offers superior drive recognition, often detecting and mounting drives that Windows cannot detect or access. The better file system compatibility includes native support for NTFS, FAT32, exFAT, ext4, and many other formats without additional drivers. Plug-and-play advantages mean drives often work immediately upon connection without requiring installation or configuration. Linux’s lighter resource usage and direct hardware access provide more reliable interaction with failing drives.
6.2 Recommended Linux Distributions
Certain Linux distributions are particularly well-suited for data recovery tasks.
6.2.1 Kali Linux
Kali Linux ![]() is a distribution specifically designed for digital forensics and penetration testing. It includes pre-installed recovery tools so you can start recovery immediately after booting. Live boot capability allows you to run Kali from USB without installing anything, making it perfect for emergency recovery situations. The system provides access to powerful command-line tools alongside graphical utilities. There are some real user success cases for hard drive data recovery.
is a distribution specifically designed for digital forensics and penetration testing. It includes pre-installed recovery tools so you can start recovery immediately after booting. Live boot capability allows you to run Kali from USB without installing anything, making it perfect for emergency recovery situations. The system provides access to powerful command-line tools alongside graphical utilities. There are some real user success cases for hard drive data recovery.

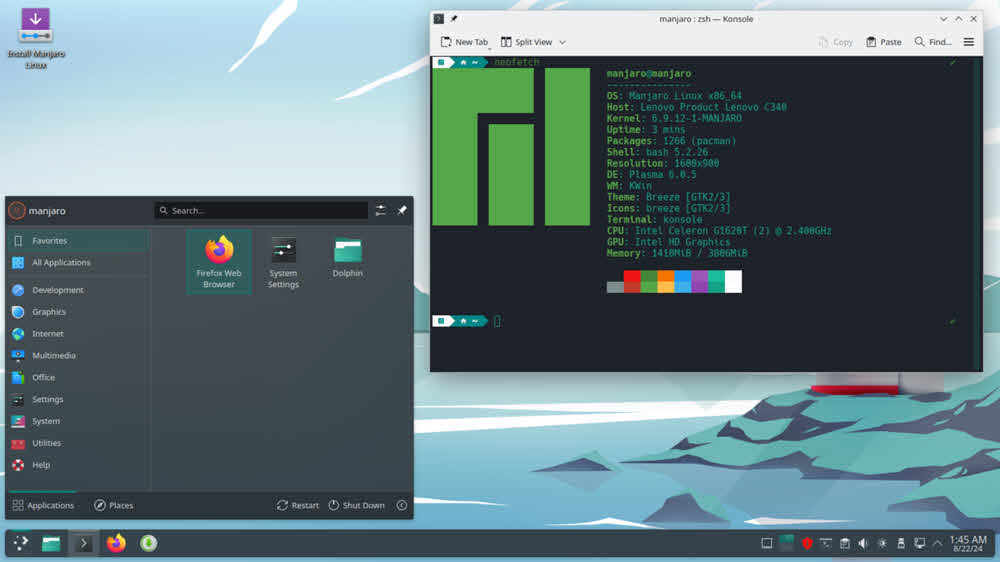
6.2.2 Manjaro Linux XFCE
Manjaro Linux ![]() XFCE provides out-of-box functionality with minimal configuration needed. The user-friendly XFCE desktop environment makes it accessible even for those unfamiliar with Linux. Minimal tweaking required means you can focus on recovery rather than system setup. Manjaro includes good hardware detection and driver support, improving compatibility with various drive types.
XFCE provides out-of-box functionality with minimal configuration needed. The user-friendly XFCE desktop environment makes it accessible even for those unfamiliar with Linux. Minimal tweaking required means you can focus on recovery rather than system setup. Manjaro includes good hardware detection and driver support, improving compatibility with various drive types.
6.3 Linux Recovery (Simple)
For many recovery scenarios, Linux requires no special tools beyond the base system:
- Boot into Linux: Install the desired Linux distribution and boot into it.
- Connect the Failed Drive: Connect your failed hard drive via USB adapter or internal SATA connection. Linux should automatically detect and make it available in the file manager.
- Copy Data to Safe Location: Open the file manager and navigate to the detected drive. Select files and folders you want to recover. Copy them to another healthy drive or external storage device.
6.4 Linux Recovery (Advanced)
When simple mounting and copying doesn’t work, Linux provides powerful command-line tools:
- ddrescue for Disk Imaging: Creates protective disk images with intelligent bad sector handling. Command:
sudo ddrescue /dev/sdX image.img logfile.log. Supports resuming interrupted imaging sessions. - TestDisk for Partition Recovery: Analyzes and reconstructs lost partition tables. Can recover deleted partitions and repair boot sectors. Supports numerous file systems including NTFS, FAT, ext2/3/4, and more.
- PhotoRec for File Recovery: Carves files from disk images or physical drives. Recovers over 200 file formats by analyzing file signatures. Works even when file systems are severely damaged.
- Mount Commands for Accessing Drives: Manually mount drives with specific options:
sudo mount -t ntfs-3g /dev/sdX1 /mnt/recovery. Use-o roflag for read-only mounting to prevent accidental writes.
7. Recovery from Specific Scenarios
Different data loss scenarios require specialized recovery approaches. Understanding your specific situation helps you choose the most effective recovery method.
7.1 RAW File System Recovery
RAW file system issues occur when the operating system cannot recognize the drive’s file system structure. The drive appears in Disk Management but shows as RAW instead of NTFS, FAT32, or exFAT. While the actual data often remains intact, the file system metadata that describes file locations and structures is corrupted or missing.
Recovery Methods for RAW Drives:
- Using specialized software: Tools like DMDE, R-Studio, or DataNumen Data Recovery can read data directly from RAW drives. These programs bypass the file system and analyze disk sectors directly.
- Rebuilding partition table: TestDisk can analyze the drive and reconstruct lost partition tables. This method often restores access to the entire drive without data loss.
7.2 Formatted Hard Drive Recovery
Recovering data from formatted hard drives is possible if you act quickly and avoid writing new data.
Best Tools for Formatted Drive Recovery
- DMDE excels at formatted drive recovery with excellent file structure preservation.
- Disk Drill provides intuitive interfaces for less technical users.
- R-Studio handles complex formatting scenarios including cross-platform recovery.
- TestDisk and PhotoRec combination works well for free recovery, especially for photo and document files.
7.3 Partition Recovery
Lost or deleted partitions require specialized tools to reconstruct partition table information.
TestDisk is the industry-standard free tool for partition recovery. It supports numerous partition types including MBR, GPT, Apple partition maps, and BSD disklabels. The software can rebuild boot sectors, recover deleted partitions, and fix partition tables. TestDisk includes detailed logging and provides step-by-step guidance through the recovery process.
7.4 Encrypted Hard Drive Recovery
Hardware-encrypted drives present unique challenges that require specialized approaches.
7.4.1 Challenges with Hardware-Encrypted Drives
Hardware-encrypted drives use dedicated controller chips to encrypt data transparently. Bypassing this controller by connecting the drive directly via SATA makes data unreadable without proper decryption. Software recovery tools cannot decrypt hardware-encrypted data without access to the encryption key. This limitation affects drives like WD MyBook, MyPassport, and many external drives.
7.4.2 Key Points in Recovery
- Decryption Tools: reallymine tool, an open-source utility specifically designed for WD MyBook and MyPassport drives. Attempts to extract encryption keys from controller boards.
- Re-soldering USB Ports: When USB ports break on encrypted drives, re-soldering offers a recovery option. This technique repairs the physical connection between the drive and encryption controller while maintaining the encryption pathway.
- Maintaining Encryption Controller Connection: The encryption controller must remain in the data pathway for successful decryption. If the enclosure is damaged, professional data recovery services have specialized equipment to interface with encryption controllers.
7.5 Deleted File Recovery
See our comprehensive guides below:
8. Recovery from Backups
Backups provide the most reliable data recovery solution when properly configured. Both Windows and macOS include built-in backup systems.
8.1 Windows File History Recovery
If Windows File History is enabled, you can use it to restore files:
- Type Restore files in the search box on the taskbar and select Restore your files with File History (Control Panel).
- Browse through your backed-up folders to locate the file you need:
- Use the arrows to navigate through different versions of the file.
- When you find the version you want, select the green Restore button at the bottom of the window.

- The file will be restored to its original location. To restore to a different location, right-click Restore and select Restore to, then choose a new location.

8.2 macOS Time Machine Recovery
If Time Machine was enabled, you can use it to restore files:
- Connect your Time Machine backup drive to your Mac (if it’s an external drive).
- Open the folder where the deleted file used to be located, or open Finder if you’re unsure.
- Click the Browse Time Machine Backups icon in your menu bar (it looks like a clock with an arrow).
- You’ll see a unique interface with your Finder windows stacked through time, with a timeline on the right side of the screen.
- Use the timeline or the arrows to navigate backward through time until you find the file.
- Click on the file to select it.
- Click the Restore button at the bottom of the screen.
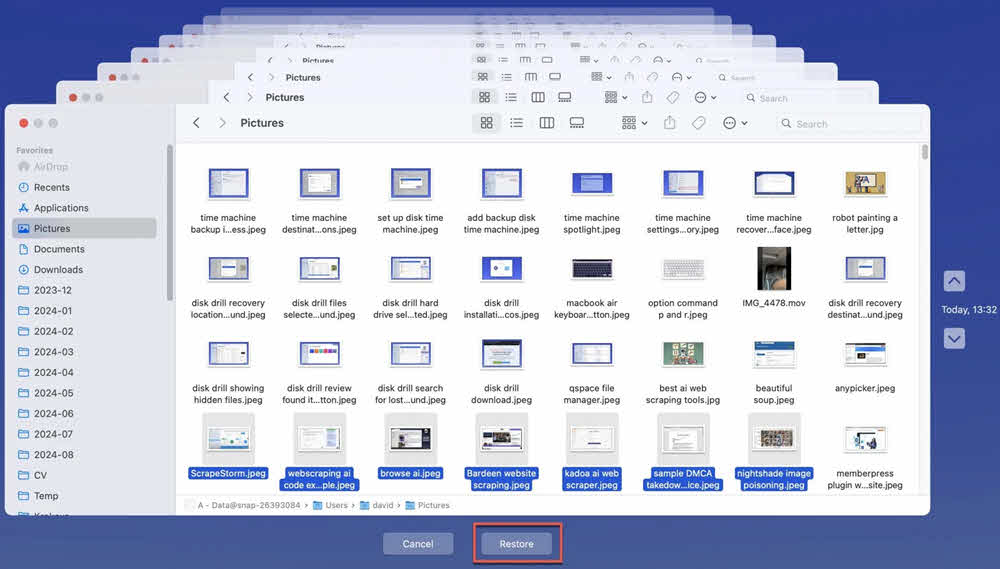
The file will be restored to its original location. You can also select multiple files at once by holding Command while clicking each file.
8.3 Cloud Backup Recovery
Cloud services offer convenient off-site backup and recovery options:
| Cloud Drive | Recover Normal Files | Recover Deleted Files | Restore to Earlier Versions |
|---|---|---|---|
| Google Drive |
Through web browser or desktop app. | Check Trash folder. Retention period: 30 days. |
Right-click any file and select Manage versions to view version history. |
| Dropbox |
Through web interface, desktop app, or mobile app. | Check Deleted files folder. Retention period: 30 days (Basic accounts), up to 180 days (Plus and Professional accounts) |
Click file’s three-dot menu and select Version history. Retention period: 30 days (Basic accounts), up to 180 days (Plus and Professional accounts) |
| OneDrive |
Through web interface or File Explorer integration on Windows. | Check Recycle bin folder. Retention period: 30 days or 93 days (Microsoft 365 subscribers) |
Right-click file in OneDrive and select Version history. Microsoft 365 subscribers get extended version history retention. |
9. Professional Data Recovery Services
Professional data recovery services become necessary when software methods fail or physical damage is present.
9.1 When to Use Professional Services
Certain situations require professional expertise and specialized equipment.
- Physical Damage: Such as:
- Clicking or grinding noises indicate mechanical failure of read/write heads
- Drive not powering on suggests power supply failure or controller board damage
- Burning smell indicates electrical component failure
- Visible physical damage from drops or impacts requires cleanroom intervention.
- Software Methods Failed: When multiple software recovery attempts produce no results, professional services provide advanced techniques and tools not available to consumers.
- Critical Business Data: Business-critical data justifies the investment in professional recovery services to maximize success chances and minimize downtime.
- Extremely Important Personal Data: Irreplaceable personal files like family photos, legal documents, or years of work warrant professional recovery attempts.
9.2 What to Avoid
Some services lack specialized data recovery expertise and should be avoided:
- Best Buy Geek Squad: Geek Squad typically outsources data recovery to third parties, adding cost without specialized expertise.
- Micro Center Recovery Services: General computer repair shops often lack proper cleanroom facilities and specialized recovery equipment.
- Non-Specialized Computer Shops: Local computer repair shops without data recovery specialization may cause additional damage through improper handling.
9.3 How to Choose a Reliable and Professional Service
Selecting the right professional service requires careful evaluation:
- Reading Google Reviews: Check Google reviews for recent customer experiences. Look for patterns in feedback about success rates and customer service.
- Comparing Multiple Quotes: Contact three to five services for quotes. Compare pricing, estimated success rates, and turnaround times.
- Asking About Success Rates: Inquire about success rates for your specific drive type and failure scenario. Reputable services provide honest assessments.
- Understanding Cleanroom Facilities: Verify the service has certified cleanroom facilities for physical drive repairs. Class 10 or better cleanrooms are necessary for professional hard drive recovery.
- Verifying Certifications: Check for industry certifications like SOC 2 Type II for data security and proper business credentials.
10. Post Recovery Tasks
After successfully recovering your data, if the original hard drive has no severe physical damage and you still want to use it, you can perform the following tasks:
- Use System File Checker to repair corrupt or missing system files: On Windows, open Command Prompt as administrator and run
sfc /scannow. This verifies system file integrity and replaces corrupted files with cached copies. For more details, see our comprehensive guide. - Use CHKDSK to fix file system errors and corruptions: After data recovery is complete and files are safely backed up, run CHKDSK
 to repair the file system. Command:
 chkdsk C: /f /rwhere C: is your drive letter. This repairs file system structures and marks bad sectors as unusable.
11. Preventing Future Data Loss
Implementing preventive measures protects against future hard drive data recovery needs.
11.1 Implementing 3-2-1 Backup Strategy
The 3-2-1 rule provides comprehensive data protection:
- 3 Copies of Data: Maintain your original data plus two backup copies to protect against simultaneous failures.
- 2 Different Media Types: Store backups on different media types (e.g., internal drive and external drive, or local backup and cloud storage) to protect against media-specific failures.
- 1 Off-Site Backup: Keep at least one backup copy offsite or in cloud storage to protect against physical disasters like fires or floods.
11.2 Regular Backup Solutions
Automate backups to ensure consistent data protection:
- Windows File History Setup: Enable File History in Settings -> Update & Security -> Backup. Connect an external drive and configure backup frequency.
- macOS Time Machine Configuration: Connect an external drive, open System Preferences -> Time Machine, and click Select Backup Disk to enable automatic hourly backups.
- Cloud Backup Services: Use services like Google Drive, Dropbox, OneDrive, or specialized backup services like Backblaze or Carbonite for automated cloud protection.
- NAS Solutions: Network Attached Storage provides centralized backup for multiple computers with RAID protection and remote access capabilities.
11.3 Hard Drive Health Monitoring
Regular monitoring helps detect problems before complete failure:
- SMART Monitoring Tools: Use tools like CrystalDiskInfo (Windows) or DriveDx (Mac) to monitor SMART attributes and receive early failure warnings.
- Temperature Monitoring: Keep drive temperatures below 50°C (122°F) during operation. Excessive heat accelerates component degradation.
- Regular Health Checks: Check SMART status monthly and investigate any warning indicators immediately.
- Warning Signs to Watch For: Increasing reallocated sector count, high raw read error rate, spin-up time increases, or unusual noises all indicate impending failure.
11.4 Best Practices for Hard Drive Care
Proper care extends hard drive lifespan and reduces failure risk:
- Proper Handling and Storage: Handle drives gently, avoid dropping or jarring them, and store unused drives in anti-static bags in cool, dry locations.
- Avoiding Physical Shock: Never move desktop computers while drives are spinning. Use shock-resistant enclosures for portable drives.
- Maintaining Proper Temperature: Ensure adequate cooling with proper case ventilation. Avoid blocking air vents on external drives.
- Safe Ejection Procedures: Always use Safely Remove Hardware (Windows) or Eject (Mac) before disconnecting external drives to prevent file system corruption.
- Surge Protection: Use quality surge protectors or uninterruptible power supplies (UPS) to protect against power fluctuations and sudden outages.
- Defragging Regularly: Regular defragmentation is beneficial for mechanical hard drives (HDD) as it will improve performance and extend drive lifespan by reducing mechanical wear. Modern Windows automatically optimizes drives in the background.
- Keep Adequate Free Spaces: For mechanical hard drives (HDD), keeping at least 10-15% free space reduces file fragmentation, improves write performance, enables effective defragmentation, and ensures proper virtual memory operation. For Windows system drives, maintain at least 20% free space to ensure smooth operation, as the operating system requires space for temporary files, updates, and virtual memory. Running out of space can cause system crashes, application failures, and data corruption risks.
11.5 When to Replace a Hard Drive
Proactive replacement prevents catastrophic data loss:
- Average Lifespan Expectations: Hard drives typically last 3-5 years under normal use. SSDs generally last longer but have write cycle limits.
- Warning Signs of Impending Failure: Increasing SMART errors, frequent crashes or freezes, slow performance, unusual noises, or files spontaneously corrupting indicate replacement needs.
- Proactive Replacement Strategy: Replace drives showing early warning signs before complete failure. Consider replacing drives approaching 4-5 years old even without obvious problems.
12. Troubleshooting Common Recovery Issues
Recovery attempts sometimes encounter specific problems requiring troubleshooting.
12.1 Drive Not Detected in Software
When recovery software cannot detect your hard drive:
- Connection Issues: Verify all cables are securely connected. Try different USB ports or SATA ports. Test with a different cable or adapter.
- Driver Problems: Update or reinstall USB/SATA controller drivers. Check Device Manager (Windows) for driver errors or conflicts.
- BIOS Settings: Ensure the drive is enabled in BIOS/UEFI. Check that SATA controllers are configured correctly (AHCI mode is usually best).
- USB vs. SATA Connection: Try connecting via SATA directly instead of USB if possible. USB bridges sometimes fail while the drive itself remains functional.
12.2 Recovery Software Shows No Files
When scans complete but find no recoverable files:
- Trying Different Scan Modes: Switch from quick scan to deep scan for more thorough analysis. Some tools offer multiple scanning algorithms.
- Signature-Based Recovery: Enable file signature scanning to find files by content patterns rather than file system structures.
- File System Considerations: Verify the software supports your drive’s file system. Some tools work better with certain file systems.
- Switching to Alternative Software: Try different recovery tools as they use different algorithms. DMDE might find files that Recuva misses, or vice versa.
12.3 Recovered Files Are Corrupted
When recovered files won’t open or show errors:
- Understanding Partial Recovery: File fragmentation or partial overwriting results in incomplete file recovery. Not all files may be fully recoverable.
- File Repair Tools: Use specialized repair utilities for specific file types (e.g., JPEG repair tools, Office document repair).
- Data Overwrite Indicators: Corruption often indicates partial overwriting of the original file location. Files modified or created after the deletion event are more likely corrupted.
- When to Try Professional Services: Severely corrupted files or consistently poor recovery results suggest professional services may have better success with advanced techniques.
12.4 Recovery Process Is Too Slow
When recovery scanning takes excessively long:
- Hard Drive Health Issues: Failing drives with many bad sectors slow down scanning. Check SMART status to assess drive health.
- Creating Image First: Always create a disk image before recovery. Working from an image is faster and safer than repeated scans of a failing drive.
- Hardware Connection Optimization: Use direct SATA connections instead of USB when possible. USB 2.0 is significantly slower than USB 3.0 or SATA.
- Realistic Time Expectations: Deep scans of multi-terabyte drives legitimately take many hours or even days. Be patient and avoid interrupting the process.
13. FAQs About Hard Drive Recovery
Q: Is hard drive recovery always possible?
A: No, hard drive recovery is not always possible. While professional data recovery services can handle most scenarios including water damage and logical corruption, certain extreme conditions make recovery impossible, such as:
- Fire or severe overheating can melt drive components and cause demagnetization, permanently destroying all data.
- Excessive physical force such as crushing or striking the drive with heavy objects can shatter platters and permanently crash the read/write heads, making magnetic data unreadable.
- Severe lightning strikes delivering up to one billion volts destroy electronic components and controller chips beyond repair.
- Data deleted months ago becomes unrecoverable because normal computer operations continuously overwrite the freed space.
- Data erased using professional wiping tools that overwrite sectors multiple times cannot be recovered.
Q: Can I recover data from a formatted hard drive?
A: Yes, data recovery from a formatted hard drive is possible, especially after quick format. Quick format only removes file system structures while leaving actual data intact. Use recovery software like DMDE, Disk Drill, or R-Studio immediately after formatting for best results. Success rates decrease if you’ve written new data to the drive or performed a full format. Acting quickly and avoiding further drive use maximizes recovery chances.
Q: Is it possible to recover data from a physically damaged hard drive?
A: Physical damage recovery depends on the severity and type of damage. Minor physical issues like broken USB ports or controller board failures can often be repaired. Severe damage including clicking noises, platter scratches, or motor failure requires professional data recovery services with cleanroom facilities. Consumer software cannot recover from physical damage. Success rates for professional physical recovery range from 40% to 90% depending on damage extent.
Q: How much does hard drive data recovery cost?
A: Costs vary significantly based on the problem type. Logical recovery (software issues) typically ranges from $300 to $500. Physical recovery (mechanical failure) costs $700 to $1,500. Complex cases like RAID reconstruction can exceed $2,000. Evaluation fees of $50-$150 apply at most services but are often waived if you proceed with recovery. Many reputable services offer no-data-no-charge policies where you only pay for successful recovery.
Q: What is the success rate of DIY hard drive recovery?
A: DIY recovery success rates depend on the cause of data loss. Recently deleted files: 80-90% success rate. Formatted drives (quick format): 60-80% success if addressed immediately. File system corruption: 50-70% success with quality software. Physical damage: near 0% success with DIY methods. Success rates improve dramatically when you stop using the drive immediately, work from disk images, and use professional-grade recovery software like DMDE or R-Studio.
Q: Can I recover data from a clicking hard drive?
A: Clicking hard drives indicate mechanical failure, usually failed read/write heads. Do not attempt DIY recovery on clicking drives as each power-on cycle risks further damage. Immediately power off the drive and contact professional data recovery services. Professionals can replace failed components in cleanroom environments to recover data. Success rates range from 50-80% depending on damage extent. Never repeatedly power on or use software recovery tools on clicking drives.
Q: Should I use CHKDSK before data recovery?
A: No, never use CHKDSK before data recovery. CHKDSK is designed for file system repair, not data recovery, and can cause irreversible damage by renaming, moving, and deleting files it considers corrupted. Always complete data recovery first using specialized recovery software. Only run CHKDSK after successfully recovering and backing up all important data. Use CHKDSK as a post-recovery tool to repair the file system for future use.
Q: Will Defrag Affect the Hard Drive Recovery?
A: Yes, disk defragmentation significantly reduces the chances of successful recovery. Defrag moves and reorganizes file fragments across the drive, which can overwrite the space occupied by deleted or lost files, dramatically decreasing the recovery rate. Never run Defrag after data loss and before recovery. Only defragging drives after successfully recovering all important data. This applies to Windows Defragment and Optimize Drives utility as well as third-party defragmentation tools.
Q: How long does hard drive recovery take?
A: Recovery time varies based on drive size and recovery method. Simple file recovery: 30 minutes to 2 hours. Full drive deep scan: 4-12 hours for 1TB drives, longer for larger capacities. Creating disk images: 2-8 hours depending on drive condition. Professional services: 3-7 days for logical recovery, 1-3 weeks for physical recovery. Failing drives with many bad sectors take significantly longer. Plan accordingly and avoid interrupting the recovery process.
Q: Can I recover files after emptying the Recycle Bin?
A: Yes, emptying the Recycle Bin does not immediately erase files from the hard disk. The space is marked as available but data remains until overwritten. Use recovery software like Recuva, DMDE, or DataNumen Data Recovery immediately after emptying the Recycle Bin. Stop using the computer to prevent overwriting deleted data. Success rates are highest within hours of deletion, declining as normal computer use gradually overwrites the freed space.
Q: What’s the difference between quick format and full format for recovery?
A: Quick format removes file system structures and marks space as available but leaves all data intact, offering excellent recovery prospects. Full format overwrites every sector with zeros or specific patterns, making recovery extremely difficult or impossible. Quick format takes seconds and creates 80-90% recovery chances if addressed promptly. Full format takes much longer and reduces recovery chances to less than 10%. Always attempt recovery immediately after quick format before writing new data.
Q: Will frequent formatting damage hard drive?
A: For mechanical hard drives (HDD), formatting itself does not cause physical damage as mechanical hard drives are not limited by write cycles. The wear comes from mechanical components like read/write heads and motors, which are minimally affected by formatting operations. However, full format involves writing to every sector, which increases operation time and minor mechanical wear. In practice, occasional formatting for legitimate purposes is perfectly safe. The real concern is unnecessary repeated formatting, which wastes time more than it damages hardware.
Q: Will recovery software work on external hard drives?
A: Yes, hard drive recovery software works on external hard drives using the same methods as internal drives. Connect the external drive to a working computer and run recovery software. Note that external drives don’t use the Recycle Bin, so deletions bypass that safety net. For physically damaged external drives, consider removing the internal drive from its enclosure and connecting it directly via SATA for better results. Most recovery tools support USB-connected drives.
Q: Can I recover data from a RAW hard drive?
A: Yes, RAW drive recovery is possible and often successful. RAW indicates the file system structure is corrupted or unreadable, but data typically remains intact. Use specialized software like DMDE, R-Studio, or TestDisk that can read data directly from RAW drives. These tools bypass the file system and analyze disk sectors directly. Success rates for RAW recovery range from 70-90% depending on the extent of file system damage and whether you avoid writing new data.
Q: Is free data recovery software reliable?
A: Free recovery software reliability varies significantly by tool. Recuva is highly reliable for simple recovery scenarios and recently deleted files. TestDisk and PhotoRec are powerful open-source tools trusted by professionals. However, free software typically has limitations: recovery size caps, fewer advanced features, and limited support. For critical data, professional tools like DMDE ($20) or R-Studio offer better success rates and more advanced capabilities. Free tools work best for straightforward recovery cases.
Q: How do I choose between recovery software and professional services?
A: Choose recovery software for logical problems: deleted files, formatted drives, file system corruption, or accidental partition deletion. Choose professional services for physical damage indicators: clicking noises, drive not spinning, burning smell, or complete failure to detect. Also choose professionals when software recovery fails, data is extremely critical, or you lack technical comfort with DIY recovery. Consider starting with software recovery ($0-$100) before professional services ($300-$1,500) unless physical damage is evident.
Q: Can encrypted drives be recovered?
A: Encrypted drive recovery depends on encryption type and key availability. Software encryption (BitLocker, FileVault): recoverable if you have the encryption key or recovery key. Hardware encryption (WD MyBook, encrypted external drives): very challenging; requires maintaining connection through original encryption controller. Data recovery services can sometimes extract encryption keys from controller boards. Never bypass hardware encryption controllers by connecting drives directly via SATA, as this makes data appear as random noise.
Q: What should I do immediately after data loss?
A: Stop using the affected hard drive immediately to prevent data overwriting. Do not install software or write any new data to the drive. If possible, power down the computer and remove the drive. Check SMART status to assess drive health before attempting recovery. Create a disk image if the drive is readable. For physical damage signs (clicking, not spinning), power off immediately and contact professional services. For logical issues, use recovery software on a disk image rather than the original drive.
14. Conclusion
14.1 Recap of Key Recovery Methods
Hard drive recovery encompasses various approaches depending on your specific situation. Built-in system tools provide basic recovery for simple scenarios. Third-party software like DMDE, R-Studio, and Disk Drill handle more complex logical recovery situations. Linux-based methods offer alternative approaches when Windows tools fail. Professional data recovery services become necessary for physical damage or when software methods prove unsuccessful. Understanding which method suits your scenario ensures the highest recovery success rate.
14.2 Importance of Acting Quickly
Time is critical in data recovery success. Every operation on a failed drive risks overwriting recoverable data. Deleted files remain recoverable only until new data occupies their space. Failing drives deteriorate further with continued use. Acting immediately after discovering data loss provides the best recovery chances. Create disk images before attempting recovery to preserve the current state. The difference between immediate action and delayed response often determines whether recovery succeeds or fails.
14.3 When to DIY vs. When to Seek Professional Help
Choose DIY recovery for logical problems including deleted files, formatted drives, RAW file systems, and accidental partitioning errors. Use quality software like DMDE or R-Studio and work from disk images. Seek professional services for any physical damage indicators: clicking noises, drive not spinning up, burning smells, or complete detection failure. Also consult professionals when software recovery attempts fail, data is irreplaceable, or you lack technical confidence. The investment in professional services is worthwhile for critical data.
14.4 Final Recommendations for Data Protection
Prevention is far superior to recovery. Implement the 3-2-1 backup strategy with three copies on two different media types and one offsite backup. Automate backups using Windows File History, macOS Time Machine, or cloud services. Monitor hard drive health regularly using SMART monitoring tools. Replace drives showing early warning signs before complete failure. Practice safe handling including proper ejection procedures and surge protection. Regular backups combined with proactive monitoring eliminates most data recovery needs. For specialized solutions, consider DataNumen products for disk imaging and data recovery, offering professional-grade capabilities for both Windows environments and various data loss scenarios.
About the Author
Qian Gua is a data recovery specialist with over 10 years of experience in Windows file systems, storage technologies, and disaster recovery solutions. He has successfully guided thousands of users through critical data loss scenarios across both personal and enterprise environments.
Qian specializes in Windows data recovery methodologies, file system analysis, and preventive backup strategies. His extensive hands-on experience includes recovering data from drives, implementing comprehensive backup solutions, and troubleshooting complex file system issues across NTFS, FAT, exFAT, and ReFS volumes. He has worked with various recovery tools and techniques, from built-in Windows utilities to professional data recovery software.
Through his technical writing, Qian is dedicated to empowering users with practical knowledge to protect and recover their valuable data. He stays current with the latest developments in Windows file recovery technologies, storage device innovations, and data protection best practices. When not helping users recover their lost files, Qian enjoys researching emerging storage technologies and sharing data safety tips that prevent future data loss.
Have questions about this guide or need help with data recovery? Qian welcomes feedback and suggestions for improving these data recovery resources.