Your product was the best and did the most! But I don't think anything can recover the data I lost. It recovered what I already had, which was more
Overview
Features
How to Recover
More Information
Related Products
Why ?
#1 Recovery
Rate
10+ Million
Users
20+ Years of
Experience
100% Satisfaction
Guarantee
Our Customers' Testimonials
... Read more
Your product was the best and did the most! But I don't think anything can recover the data I lost. It recovered what I already had, which was more than previous products, but none of the 3.5 weeks of data that was missing. If I thought the missing data was there, I would have definitely paid $50 to retrieve, and MAYBE $100 if I was Positive that all of the missing data was there. But it wasn't, so it wasn't worth $100.
Ms. Mascha Fujimoto
Retired
Arizona, USA
March 16, 2021
Extremely Simple Interface
Main GUI
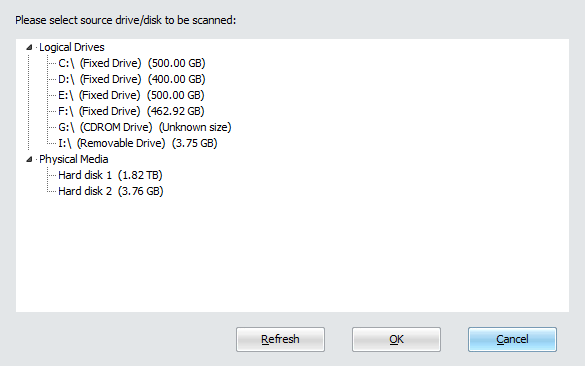
Select Source Drive or Disk
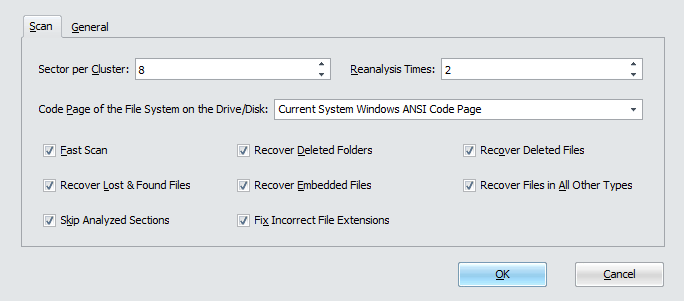
Select Recovery Options
Free Download20+ Years Of Experience
Buy Now100% Satisfaction Guarantee
Main Features
- Support all kinds of file systems, including NTFS, FAT, FAT32 and Ext2.
- Recover files lost due to reformat of the drive, corruption of the drive or any other reasons.
- Recover deleted files.
- Recover streams associated with the lost and deleted files.
- Scan raw disk data exhaustively and search for lost and deleted files of more than 430+ known types, by using an internal expert system with extensive knowledge about the characteristics and structures of the file type specifications.
- Recover deleted files from recycle bin.
- Recover lost and deleted folders and the whole folder hierarchy recursively.
- Support Unicode file names and folder names.
- Rename files and folders automatically when duplicate exists.
- Use a simple wizard interface to instruct you go through the recovery process easily and efficiently.
- Filter and sort the lost and deleted files and folders according to various criteria.
Free Download20+ Years Of Experience
Buy Now100% Satisfaction Guarantee
Using DataNumen Data Recovery to Recover Files on Your Drives
Start DataNumen Data Recovery:

You can select the drive or disk to be scanned, then click the "OK" button to start the scan process.
Note: Before scanning the drive or disk, make sure no files or folders in the drive or disk is being opened. And there are no other applications accessing the drive or disk.
Alternatively, you can select the following menu item:
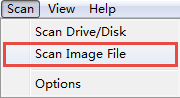
to scan an image file instead of a drive or disk.
You can also select this menu item:

to open the following dialog:

and set the scan options before the scan process.
After starting the scan process, the progress bar
![]()
will indicate the scan progress. During the process, you can click ![]() button to stop the scan process.
button to stop the scan process.
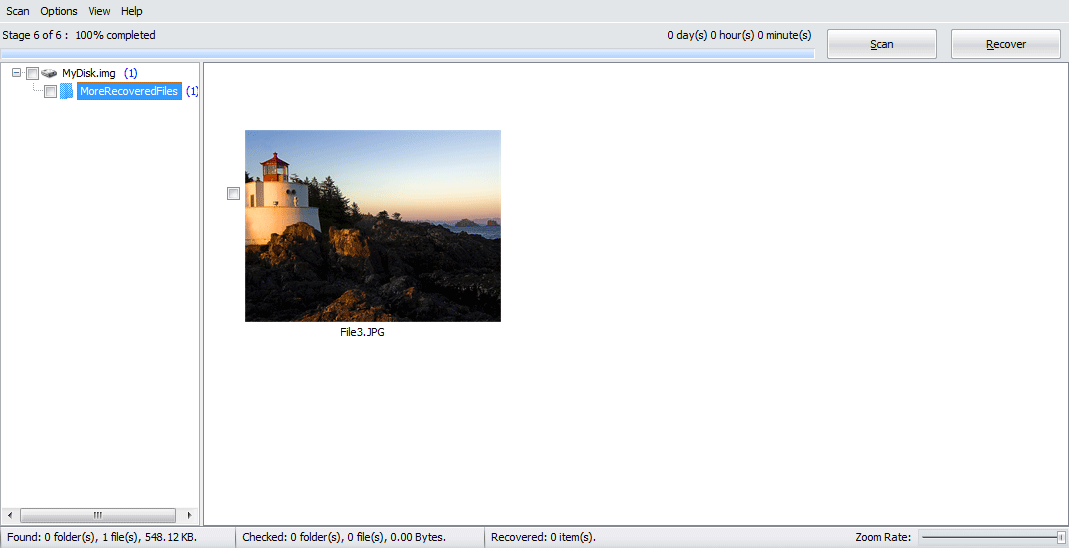
After the scan process, if any lost and deleted files or folders are recoverable, you will see a preview of these files:

Check the files or folders you want to recover, then click ![]() button, you will see the following dialog:
button, you will see the following dialog:

You can set the output directory in the dialog and click "OK" button to start recovering the checked items.
DataNumen Data Recovery will then recover all the checked items for you. After the recovery process, the following message box will pop up:

Then you can open the output directory and access all the recovered items.
More Information


Related Products