Overview
Features
More Information
Related Products
Why ?
#1 Recovery
Rate
10+ Million
Users
20+ Years of
Experience
100% Satisfaction
Guarantee
Extremely Simple Interface
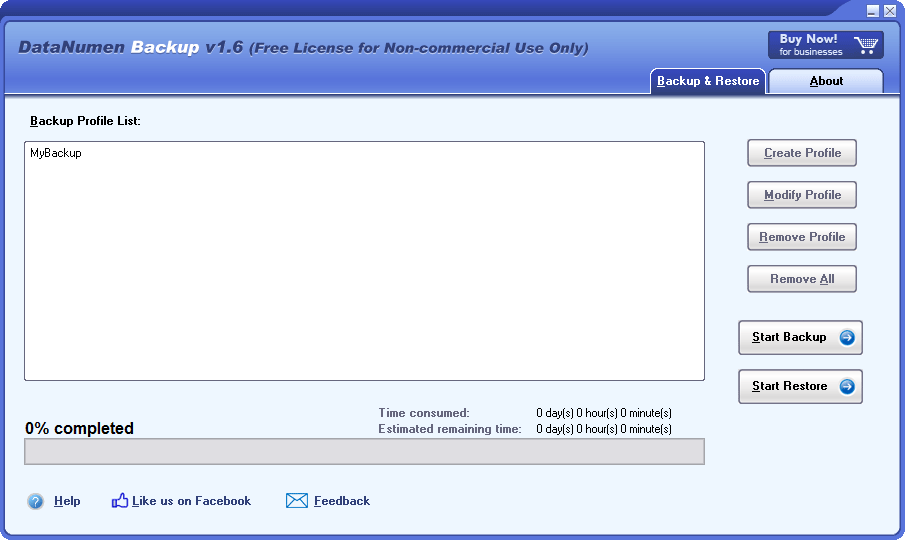
Main GUI
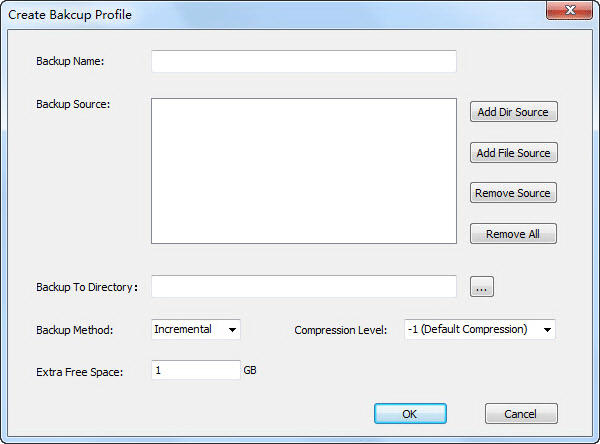
Create Backup Profile
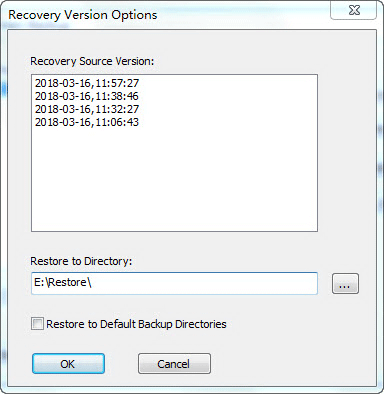
Select Restore Version
Free Download20+ Years Of Experience
Buy Now100% Satisfaction Guarantee
Main Features
- Back up files and directories.
- Back up multiple sources at the same time.
- Support full, incremental, and differential backup methods.
- Support multiple backup profiles.
Free Download20+ Years Of Experience
Buy Now100% Satisfaction Guarantee
More Information
Related Products
DataNumen Disk Image
DataNumen Disk Image is a powerful tool to clone and restore disks or drives.
Details