
တစ်ခါတစ်ရံတွင် သင်သည် သီးခြား Windows ဖိုင်တွဲတစ်ခုရှိ နောက်ဆုံးမွမ်းမံထားသောဖိုင်ကို Outlook အီးမေးလ်တစ်ခုသို့ အမြန်ရှာဖွေပြီး ပူးတွဲလိုပေမည်။ ဤကိစ္စတွင်၊ ဤဆောင်းပါးတွင်ဖော်ပြထားသောနည်းလမ်းကိုသင်အသုံးပြုနိုင်သည်။
အသုံးပြုသူအချို့က Windows folder ထဲက နောက်ဆုံးပြင်ဆင်ထားတဲ့ဖိုင်ကို Outlook က မြန်မြန်ဆန်ဆန် ရှာဖွေပြီး အီးမေးလ်ထဲ ထည့်သွင်းစေချင်ကြပါတယ်။ ဥပမာ - မကြာသေးမီက ဖန်တီးထားတဲ့၊ ပြောင်းလဲထားတဲ့ ဒါမှမဟုတ် သိမ်းဆည်းထားတဲ့ ဖိုင်လိုမျိုးပေါ့။ ဒါပေမယ့် Outlook မှာ ဒီလို တိုက်ရိုက်နဲ့ native feature မပါပါဘူး။ ဒါကြောင့် အောက်ပါတို့မှာ VBA code တစ်ခုကို ဖော်ပြပေးပါမယ်။
Windows Folder တွင် နောက်ဆုံးမွမ်းမံထားသောဖိုင်ကို အီးမေးလ်ဖြင့် တွဲပါ။
- အစပိုင်းတွင်၊ သင်သည် သင်၏ Outlook အက်ပ်ကို စတင်သင့်သည်။
- ထို့နောက် ပင်မ Outlook ဝင်းဒိုးသို့ သင်ရောက်ရှိပြီးနောက်၊ သင်သည် “Alt + F11” ခလုတ်များကို နှိပ်နိုင်သည်။
- ထို့နောက် အောင်မြင်စွာ Outlook VBA တည်းဖြတ်ဝင်းဒိုးကို သင်ဝင်ရောက်နိုင်ပါမည်။
- နောက်ပိုင်းတွင်၊ အသုံးမပြုသော module တစ်ခုကို ရှာဖွေပြီး ဖွင့်သင့်သည်။
- ထို့နောက် ဤ module window တွင် အောက်ပါ VBA ကုဒ်ကို ကူးယူပြီး ကူးထည့်ပါ။
Sub AttachLastModifiedSpecificFile()
    Dim objShell As Object
    Dim objSelectedFolder As Object
    Dim objFileSystem As Object
    Dim strSourceFolderPath As String
    Dim objSourceFolder As Object
    Dim objFile As Object
    Dim dLastModifiedDate As Date
    Dim strLastModifiedFilePath As String
    Dim objMail As Outlook.MailItem

    On Error GoTo ErrorHandler
    'Select a local source folder
    Set objShell = CreateObject("Shell.Application")
    Set objSelectedFolder = objShell.BrowseForFolder(0, "Select the source folder", 0, "")
    strSourceFolderPath = objSelectedFolder.self.Path

    Set objFileSystem = CreateObject("Scripting.FileSystemObject")
    Set objSourceFolder = objFileSystem.GetFolder(strSourceFolderPath)

    If objSourceFolder.Files.Count > 0 Then
       For Each objFile In objSourceFolder.Files
           'Find the last modified file within "xlsx" file type in the selected Windows folder
           If (objFile.DateLastModified > dLastModifiedDate) And (objFileSystem.GetExtensionName(objFile) = "xlsx") Then
              'You can add or change criteria, such as
              'Left(objFile.Name, 4) = "Test" ---> file whose name begins with "Test"
              '(objFile / 1024) / 1024 > 2 --> File exceeds 2 MB
              'Note: Use "And" to connect more than one criteria
              strLastModifiedFilePath = objFile.Path
              dLastModifiedDate = objFile.DateLastModified
           End If
       Next

       If strLastModifiedFilePath <> "" Then
          'Confirm attaching it to the current outlook email
          strMsg = "The last modified file in the " & Chr(34) & strSourceFolderPath & Chr(34) & " is: " & vbCrLf & vbCrLf & "File: " & strLastModifiedFilePath & vbCrLf & "Date: " & dLastModifiedDate & vbCrLf & vbCrLf & "Do you want to attach it?"
          nPrompt = MsgBox(strMsg, vbQuestion + vbYesNo, "Confirm Attaching Last Modified File")

          If nPrompt = vbYes Then
             Set objMail = Outlook.Application.ActiveInspector.CurrentItem
             objMail.Attachments.Add strLastModifiedFilePath
         End If
      Else
         MsgBox "No file in the selected folder can meet your predefined criteria!", vbExclamation + vbOKOnly
      End If
    Else
      MsgBox "No file exists in the selected Windows folder!", vbExclamation + vbOKOnly
    End If

ErrorHandler:
    Exit Sub
End Sub
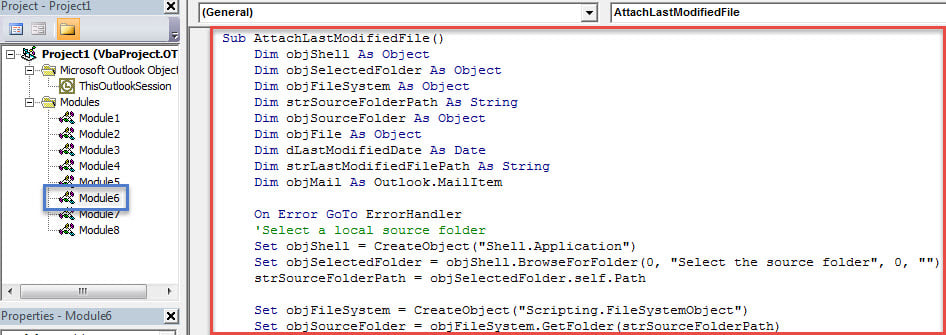
- ၎င်းနောက်၊ သင်သည် လက်ရှိ VBA တည်းဖြတ်ဝင်းဒိုးမှ ထွက်နိုင်ပြီး အမြန်ဝင်ရောက်ခြင်းတူးလ်ဘား သို့မဟုတ် မက်ဆေ့ချ်ဝင်းဒိုး၏ဖဲကြိုးတွင် မက်ခရိုအသစ်ကို ထပ်ထည့်ရန် ဆက်လက်လုပ်ဆောင်နိုင်သည်။
- နောက်ပိုင်းတွင် သင်သည် သင်၏ Outlook မက်ခရိုလုံခြုံရေးအဆင့်ကို နိမ့်စေရန် ပြောင်းလဲရန် လိုအပ်သည်။
- နောက်ဆုံးမှာ သင်ကြိုးစားနိုင်မှာပါ။
- ပထမဦးစွာ၊ ပုံမှန်အတိုင်း Outlook အီးမေးလ်အသစ်ကို ဖန်တီးပြီး ရေးဖွဲ့ပါ။
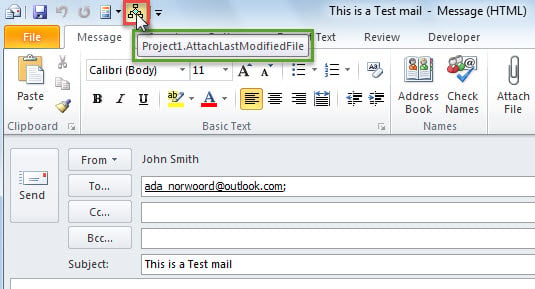
- ထို့နောက် အောက်ပါပုံကဲ့သို့ Quick Access Toolbar ရှိ မက်ခရိုခလုတ်ကို နှိပ်ပါ။

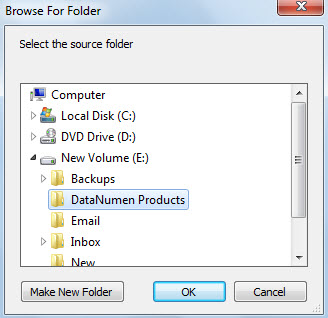
- ထို့နောက် သင်သည် ရင်းမြစ် Windows ဖိုဒါကို ရွေးချယ်ပြီး “OK” ကိုနှိပ်ရန် လိုအပ်မည်ဖြစ်သည်။

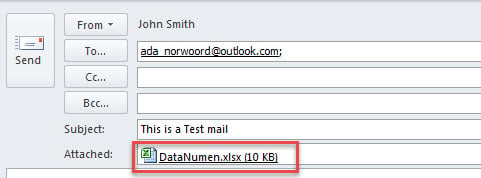
- ရွေးချယ်ထားသော Windows ဖိုဒါတွင် ထိုသို့သောဖိုင်တစ်ခုရှိနေပါက၊ သင်သည် အောက်ပါစခရင်ပုံစခရင်ပုံကဲ့သို့ အမှာစာတစ်ခုရပါမည်-

- "Yes" ကိုနှိပ်လိုက်သောအခါ၊ ဤဖိုင်ကို တစ်ပြိုင်နက် ပူးတွဲတင်ပြပါမည်။


Outlook ပြဿနာများကို တတ်နိုင်သမျှ အမြန်ဆုံးဖြေရှင်းပါ။
သင် Outlook ပြဿနာများကြုံတွေ့ရတိုင်း၊ ၎င်းတို့ကို တတ်နိုင်သမျှ အမြန်ဆုံးဖြေရှင်းရန် အကြံပြုထားသည်။ ဒီလိုအခြေအနေမျိုးမှာ ခိုင်ခံ့အောင် ပြင်ဆင်ထားရင် ပိုကောင်းမယ်။ Outlook ပြင်ဆင်မှု ကဲ့သို့သော tool ကိုကြိုတင် DataNumen Outlook Repair. ၎င်းသည် PST အမှားများကို ပြုပြင်နိုင်ပြီး သင်၏ Outlook ဒေတာကို ထိရောက်စွာ ကယ်တင်နိုင်စွမ်းရှိသည်။
စာရေးသူနိဒါန်း:
Shirley Zhang သည် ဒေတာပြန်လည်ရယူရေးဆိုင်ရာ ကျွမ်းကျင်သူဖြစ်သည်။ DataNumen, Inc. အပါအဝင် ဒေတာပြန်လည်ရယူရေးနည်းပညာများတွင် ကမ္ဘာ့ခေါင်းဆောင်ဖြစ်သည်။ mdf ပျက်စီးနေသည်။ နှင့် outlook ပြုပြင်ရေး software ထုတ်ကုန်များ။ ပိုမိုသိရှိလိုပါကသွားရောက်ကြည့်ရှု www ။datanumen.com