Thank you! It worked.
I'll recommend you to anyone who has to recover a Tar file.
DataNumen TAR Repair is the best TAR repair and recovery tool in the world. It can repair the corrupt or damaged TAR archives and recover as much of your data as possible, thereby minimizing the loss in file corruption.
Thank you! It worked.
I'll recommend you to anyone who has to recover a Tar file.
MShawn Scott
Huntsville, Alabama, USA
I bought your software yesterday to recover a 7GB tar file that was my entire "Documents and Settings" directory from my laptop which is going in for
I bought your software yesterday to recover a 7GB tar file that was my entire "Documents and Settings" directory from my laptop which is going in for service. Some of the documents were *extremely* important like my Quicken data, invoices for my business, and tax preparation summary for my accountant.
The freebie version showed that it could apparently repair everything I lost, so I bought and registered the software. When I ran it, it saved Docs_fixed.tar, and I ran a *tar xvf* on it. It died with errors and passed up most of the contents.
However, I re-ran the tar command with filename arguments to just extract the ones I was interested in (my whole "Finances"
directory), and by God, it got them all in perfect condition.
I just want to say thank you. Thank you. Thank you. Thank you. Thank you. Thank you. If there's anything I can do for you in the future (fruit basket at Christmas, wash your car, pick up your laundry, sexual favors) I am indebted to you, your company, and your software.
You guys rock.
Kevin Smith
Electronics Designer, Farmer, Electrician, Musician
Texas, USA
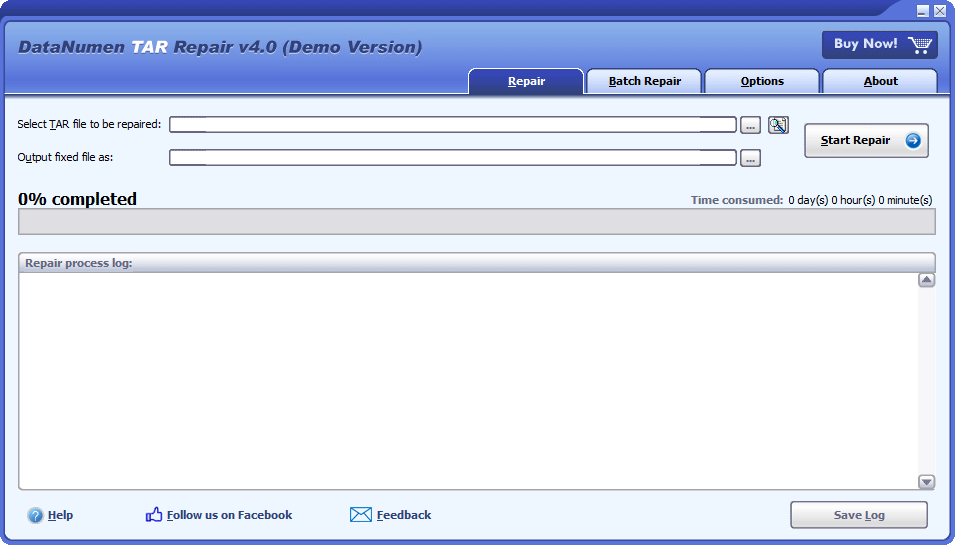
Start DataNumen TAR Repair.
Note: Before recovering any damaged or corrupt TAR archive with DataNumen TAR Repair, please close any other applications that may access the TAR archive.
Select the damaged or corrupt TAR archive to be repaired:
![]()
You can input the TAR archive name directly or click the ![]() button to browse and select the archive file. You may also click the
button to browse and select the archive file. You may also click the ![]() button to find the TAR archive file to be repaired on the local computer.
button to find the TAR archive file to be repaired on the local computer.
By default, DataNumen TAR Repair will save the fixed TAR archive file as xxxx_fixed.tar, where xxxx is the name of the source TAR archive. For example, for source TAR archive Damaged.tar, the default fixed archive will be Damaged_fixed.tar. If you want to use another name, then please select or set it accordingly:
![]()
You can input the fixed archive file name directly or click the ![]() button to browse and select the fixed archive file.
button to browse and select the fixed archive file.
Click the ![]() button, and DataNumen TAR Repair will start scanning and repairing the source TAR archive. Progress bar
button, and DataNumen TAR Repair will start scanning and repairing the source TAR archive. Progress bar
![]()
will indicate the repair progress.
After the repair process, if the source TAR archive can be repaired successfully, you will see a message box like this:

Now you can open the fixed TAR archive with the corresponding applications.
Archive data recovery suite, including recovery tools for corrupt Zip and SFX archives, RAR archives, Unix TAR archives, and Microsoft CAB archives.
Details
 DataNumen TAR Repair