Overview
Features
How to Recover
More Information
Related Products
Why DataNumen Outlook Express Drive Recovery?
#1 Recovery
Rate
10+ Million
Users
20+ Years of
Experience
100% Satisfaction
Guarantee
Extremely Simple Interface
Recovery
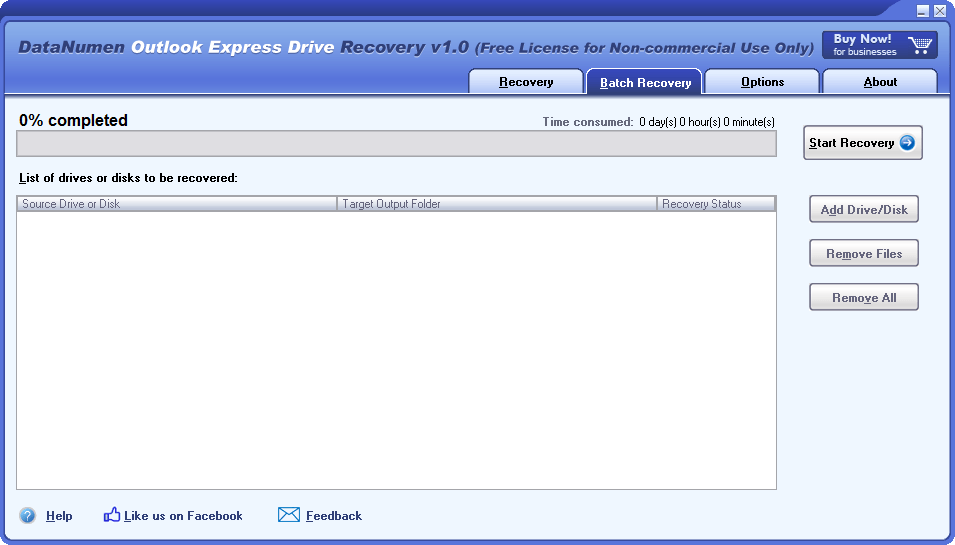
Batch Recovery
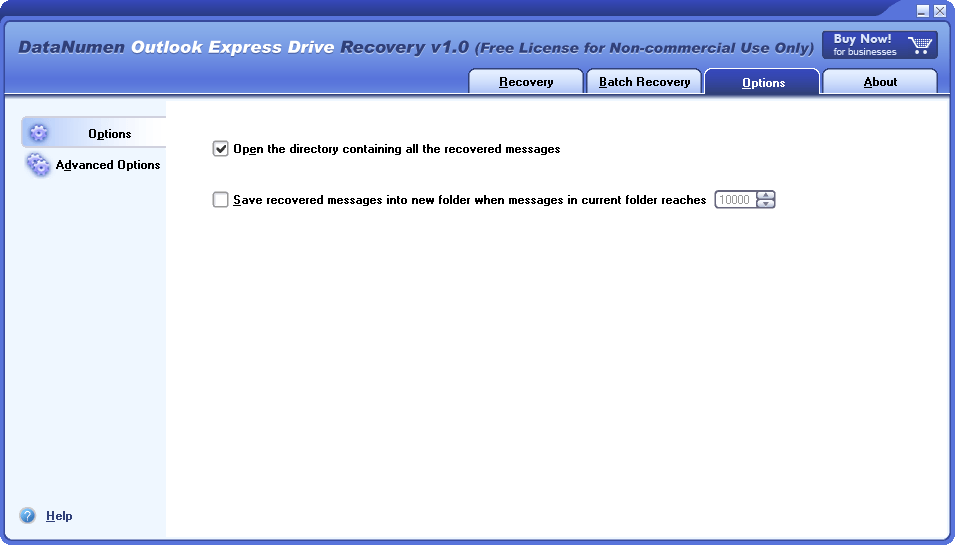
Options
Resolution for the Scenarios Below:

- Unintentionally erasing the .dbx files of Outlook Express and subsequently clearing the Recycle Bin.
- Inadvertently causing a permanent deletion of the .dbx files associated with Outlook Express.
- Accidentally formatting the drive storing your Outlook Express .dbx files.
- Mistakenly removing the partition where the Outlook Express .dbx files are stored.
- Erroneously re-partitioning the disk, thereby losing access to the drive storing the .dbx files.
- Experiencing hardware failure that inhibits reading of the drive or disk storing the .dbx files.
- Facing situations where the drive or disk storing the .dbx files is unbootable or unrecognized due to various reasons, such as a corrupted partition table, Master Boot Record (MBR), etc.
In all these instances, as well as any other situations where you are unable to retrieve the Outlook Express data on your local drives or disks, you can confidently turn to DataNumen Outlook Express Drive Recovery for assistance.
Main Features
- Recover all versions of Microsoft Outlook Express emails.
- Recover Outlook Express emails from any type of drive or disk.
Employing DataNumen Outlook Express Drive Recovery for Email Recovery
Important Reminder: SHOULD ANY ERROR OCCURS WITH YOUR OUTLOOK EXPRESS DATA STORED IN A STORAGE DEVICE, IT IS CRITICAL TO AVOID WRITING OR ALTERING ANY DATA ON THAT DEVICE. DOEDR OPERATES STRICTLY IN READ-ONLY MODE, ENSURING THAT NO DATA ON YOUR DRIVE OR DISK IS WRITTEN OVER OR MODIFIED.
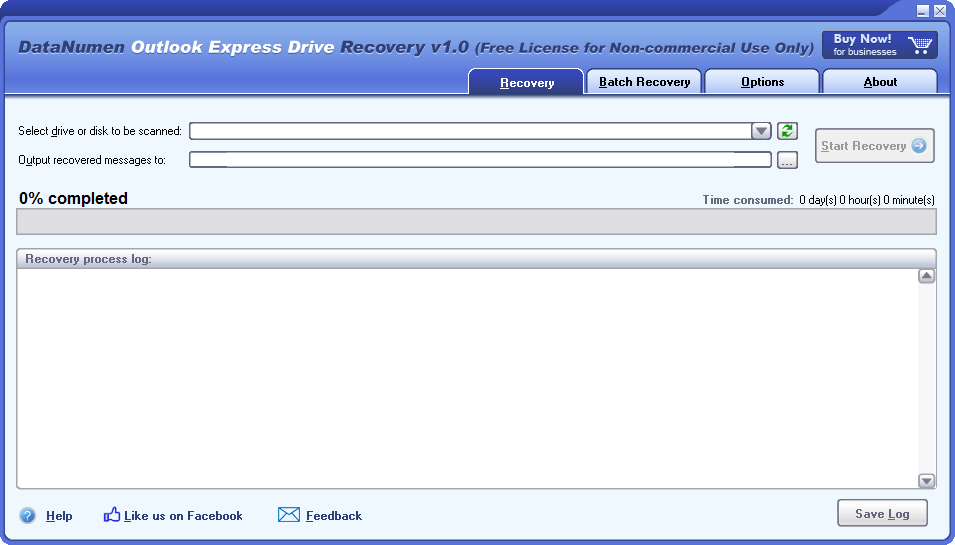
Start DataNumen Outlook Express Drive Recovery
Reminder: Please ensure that Outlook Express is closed prior to initiating email recovery with DataNumen Outlook Express Drive Recovery.
If the logical drive originally housing your Outlook Express dbx files remains intact and its size or location hasn't been altered, it should be the drive you select for the scan.
![]()
In the event that the logical drive is no longer available, whether due to disk re-partitioning, loss of MBR or partition data, or other reasons, or if the logical drive has been resized or relocated using partition tools like Partition Magic, then the entire hard disk containing the dbx files should be designated as the source disk for scanning:
![]()
If you happen to mount or unmount a detachable disk on your computer after starting DataNumen Outlook Express Drive Recovery, you can hit the ![]() button to update the list of drives and disks in the combo box.
button to update the list of drives and disks in the combo box.
Kindly choose the destination folder:
![]()
All the recovered emails will be stored as .eml files in the destination folder. You can either manually input the name of the desired destination folder or utilize the ![]() button to browse and select your preferred folder.
button to browse and select your preferred folder.
Important Reminder: TO AVOID ACCIDENTAL OVERWRITE OF YOUR OUTLOOK EXPRESS DATA ON THE SOURCE DEVICE, PLEASE ENSURE THAT YOUR CHOSEN OUTPUT FOLDER IS NOT LOCATED ON THE SAME DRIVE OR DISK.
By clicking the ![]() button, you will instruct DataNumen Outlook Express Drive Recovery to scan the selected drive or disk, and retrieve emails from it. The progress will be displayed on the bar:
button, you will instruct DataNumen Outlook Express Drive Recovery to scan the selected drive or disk, and retrieve emails from it. The progress will be displayed on the bar:
![]()
Upon completion of the recovery process, should any messages have been successfully retrieved from the drive or disk, a message box similar to the following will appear:

You can now open a recovered message using Outlook Express by double-clicking the ![]() icon of an .eml file in the output directory. Alternatively, you can import multiple messages into an Outlook Express folder.
icon of an .eml file in the output directory. Alternatively, you can import multiple messages into an Outlook Express folder.
More Information
Related Products
DataNumen Exchange Recovery
Recover messages and other items from orphaned or damaged Microsoft Exchange offline storage files (.ost)
Details
DataNumen Outlook Express Repair
Recover emails from corrupt Outlook Express dbx and mbx files.
Details
 DataNumen Outlook Express Drive Recovery