Overview
Features
How to Recover
More Information
Related Products
Why DataNumen NTFS Undelete?
#1 Recovery
Rate
10+ Million
Users
20+ Years of
Experience
100% Satisfaction
Guarantee
Extremely Simple Interface
Start Wizard
Select Drives
Scan Options
Main Features
- Support to all versions of NTFS formats.
- Recover deleted files.
- Recover streams associated with the deleted files.
- Scan raw disk data exhaustively and search for deleted files of more than 70 known types, by using an internal expert system with extensive knowledge about the characteristics and structures of the file type specifications.
- Recover deleted files from recycle bin.
- Recover deleted folders and the whole folder hierarchy recursively.
- Rename files and folders automatically when duplicate exists.
- Use a simple wizard interface to instruct you go through the recovery process easily and efficiently.
- Filter and sort the deleted files and folders according to various criteria.
Using DataNumen NTFS Undelete to Undelete Files on NTFS Drives
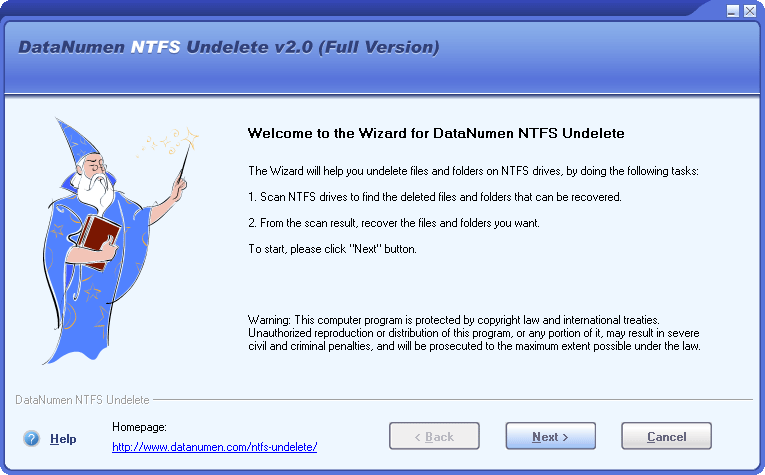
Start DataNumen NTFS Undelete. You will see the "Start Wizard" page, which will outline the main tasks performed in the undelete process:

Click the ![]() button to go to the next step.
button to go to the next step.
Note: Before recovering deleted files on NTFS drives with DataNumen NTFS Undelete, you'd better close any other applications.
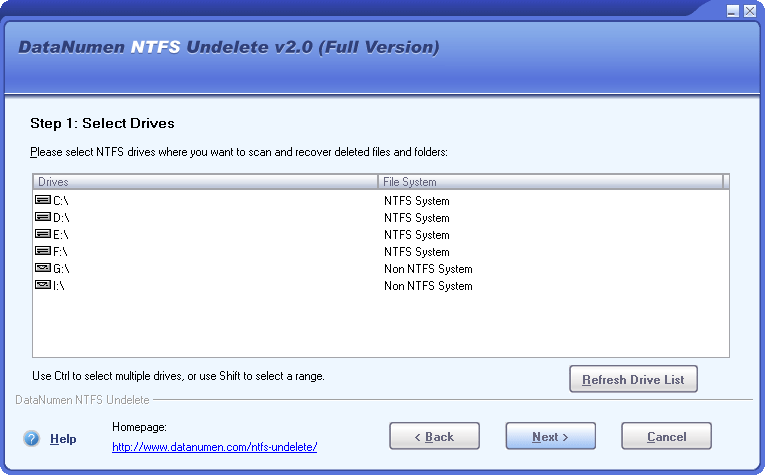
In this page, all the drives on your computers are listed, as follows:

In the list, you can select one or multiple NTFS drives where you want to scan and recover deleted files and folders, then click the ![]() button to go to the next step.
button to go to the next step.
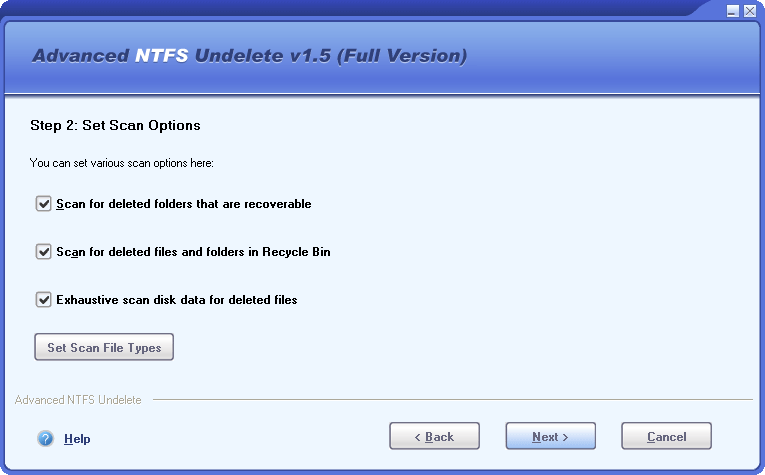
In this page, you can set the options for the scan process:

then click the ![]() button to go to the next step.
button to go to the next step.
In this page, the drives you selected and the options you set for the scan process are all listed for you to confirm:

If everything is OK, please click the ![]() button to start the scan process.
button to start the scan process.
In this page, DataNumen NTFS Undelete will scan your drives and searching for recoverable files and folders:

Progress bar
![]()
will indicate the scan progress.
After the scan process, if any deleted files or folders are recoverable, you will see a message box like this:

Click "OK" button, then we will go to the next page.
In the center of this page, all the deleted files that are found to be recoverable during the previous scan process are listed. If you enable "Scan for deleted folders that are recoverable" in the scan options, then the deleted folders that are recoverable are also listed.

In the list, you can select one or multiple files or folders you want to recover, then click the ![]() button to go to the next step. You may filter or sort the list so that you can quickly find what you want and then make the selection.
button to go to the next step. You may filter or sort the list so that you can quickly find what you want and then make the selection.
In this page, you can select the output folder for the undeleted files and folders:

Moreover, you can set other recovery options here. After that, please click the ![]() button to go to the next step.
button to go to the next step.
In this page, the files and folders you selected to recover, as well as the output folder and the options you set for the recovery process are all listed for you to confirm:

If everything is OK, please click the ![]() button to start the recovery process.
button to start the recovery process.
In this page, DataNumen NTFS Undelete will recover the files and folders you select from your drives according to the recovery options you set, and output them into the output folder you specified.

Progress bar
![]()
will indicate the recovery progress.
After the recovery process, if any deleted files or folders are recovered successfully, you will see a message box like this:
Now you can open the output directory and access all the recovered files and folders.
More Information
Related Products
 DataNumen NTFS Undelete